


PowerApps portals are the successor of Dynamics 365 portals. They help provide a top-notch customer experience without requiring technical expertise. Initially, with Power Apps, businesses could deliver low-code apps to their employees, but their customers couldn’t access them. Thanks to PowerApps portals, customers can now access the data stored in Common Data Service.
PowerApps portal not only provides a WYSIWYG editor to drag the components or templates for intuitive frontend design but also ensures that there’s no anonymous login. If an anonymous external user tries to access the data, they should have permission for it. Just like we have role-based access in the Dynamics 365 portal, here, you can set permissions for each page. And the user must have a license to access the portal.
Here’s how to set the page permissions.
Steps to Manage Page Permissions in PowerApps Portals
In PowerApps portals, you can control user access to portal web pages by setting page permission using PowerApps portal editor or portal management app.
To set page permission from PowerApps:
Step 1: Go to -> Power Apps
Step 2: Navigate to the Apps section from the left side of the menu
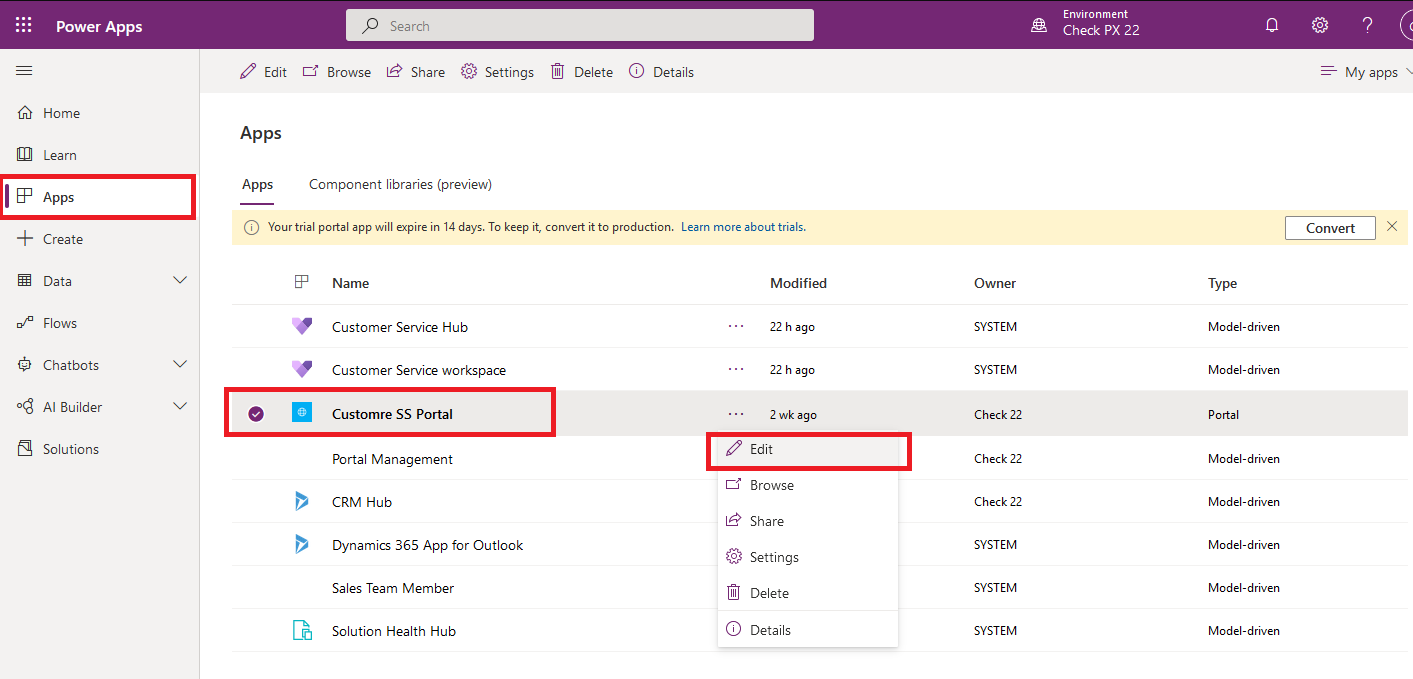
Step 3: From the Apps list, select your portal. Click on the three dots (…) in the Modified column and then hit the Edit button from the drop down options.
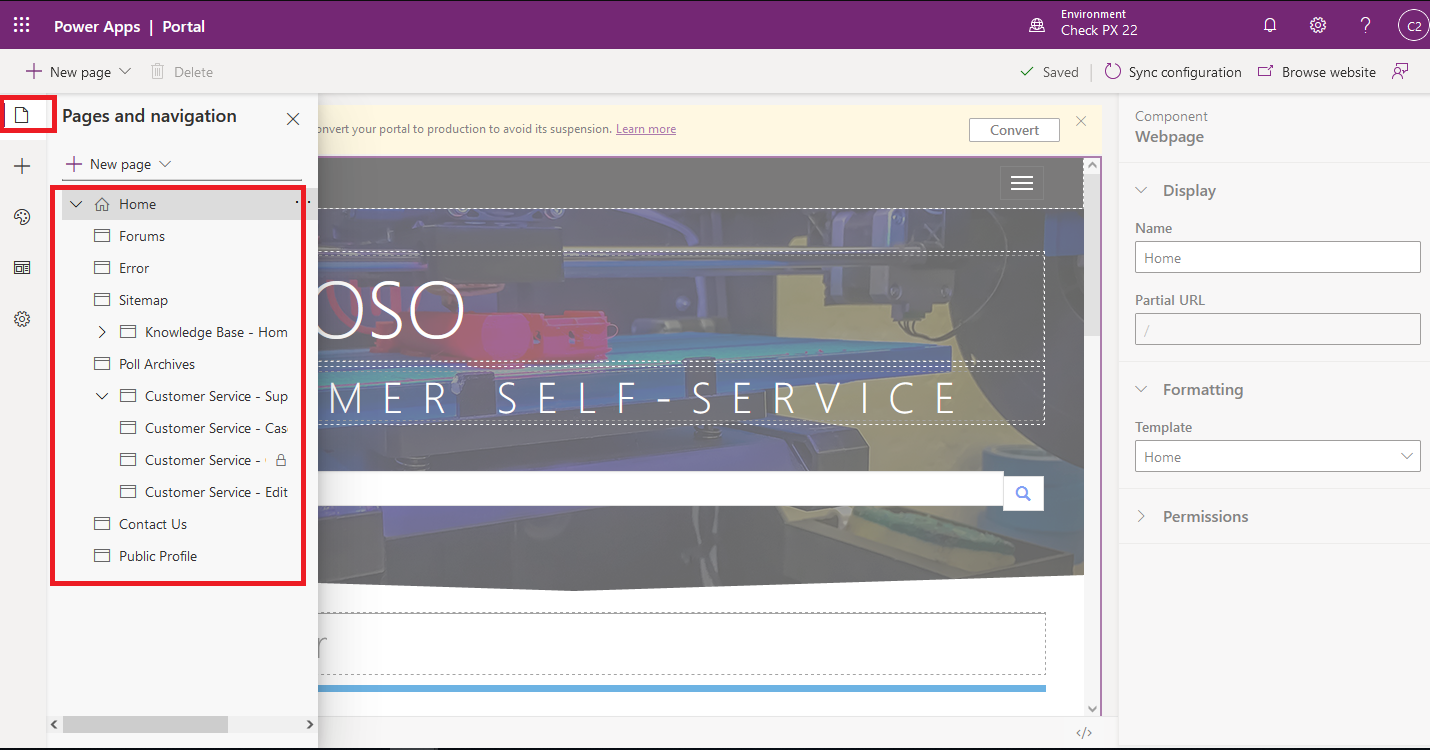
Step 4: On clicking edit, the PowerApps Portal Editor will open.
Step 5: Click on the Pages icon from the options on the left corner of the screen. Next, click on any one page for which you want to set permissions.
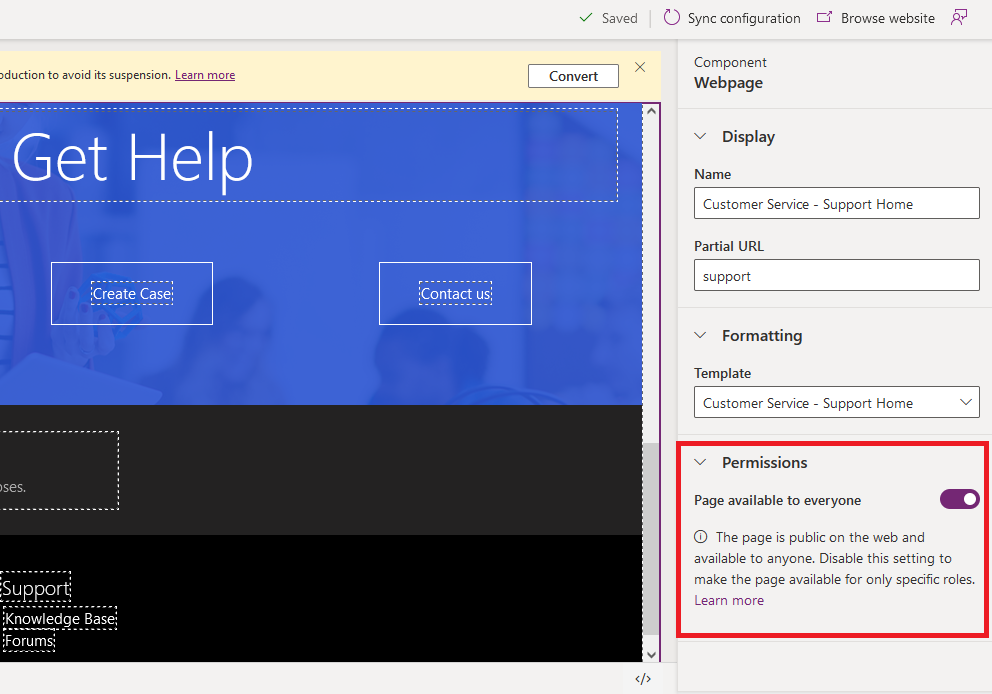
Step 6: On the Component pane (right side of the screen), expand Permissions. The Permission options depend on the page you’ve selected. For example, a parent page will have different options than a child page that inherited permissions from the parent page.
Different Permission Options
> When you enable the option Page available to everyone, the page becomes available to everyone. This option is available on the root page of a website or a child page whose parent page has enabled this option.
> When a Page available to everyone is disabled, the page isn’t available to anyone by default. You can select specific roles that you want to allow access to this page.

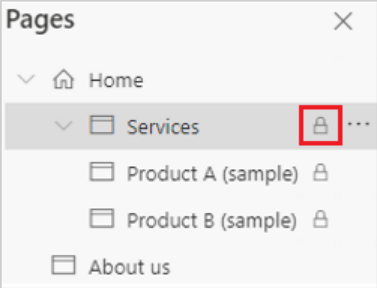
> When a page is set to Off for Page for everyone, a lock icon appears in pages to mark that the page has restrictions.
> You can select roles for which the page will be accessible. For instance, Account Reader, Administrators, or Authenticated Users.

> If you enable the Permissions apply to child files option, the child pages’ web files will be available to only those users who can access the web page. If disabled, everyone can access the child web files of the selected page, including the ones who don’t have access.
Conclusion
Security is of utmost importance for businesses. Hence, it’s essential to have page permissions that eliminate the chances of unauthorized access and ensure data security. By following the steps mentioned above, you can set different page permissions within your PowerApps Portals.
All product and company names are trademarks™, registered® or copyright© trademarks of their respective holders. Use of them does not imply any affiliation with or endorsement by them.


