


By using Plugin Registration’s Pre-Validation stage, we can validate or modify before the main operation occurs. Pre-validation stage will occur before the main operation executes.
Here, we have given one example of how we can use the Pre-validation stage in plugin registration tools.
For Example, we have given the Pre-validation on the Account entity, so whenever any account record is updated, it will update the Fax number as shown below.
Follow the below steps :
Step 1: Add the below code in your code editor for the plugin.
    using System;
using System.Collections.Generic;

using System.Linq;

using System.Text;

using System.Threading.Tasks;

using Microsoft.Xrm.Sdk;

namespace Plugindemo

{

    public class Prevlidationclass : IPlugin

    {

        public void Execute(IServiceProvider serviceProvider)

        {

            ITracingService tracingService =

            (ITracingService)serviceProvider.GetService(typeof(ITracingService));


            IPluginExecutionContext context = (IPluginExecutionContext)

                serviceProvider.GetService(typeof(IPluginExecutionContext));


                    if (context.InputParameters.Contains("Target") &&

                 context.InputParameters["Target"] is Entity)

            {

                Entity entity = (Entity)context.InputParameters["Target"];

                try

                {

                    if (entity.LogicalName == "account")


                    {

                        if (entity.Attributes.Contains("fax") == false)

                        {

                            entity.Attributes.Add("fax", "1122344343");


                        }

                    }

                }

                catch (Exception Ex)

                {

                    //tracingService.Trace("Myplugin:{0}", Ex.ToString());

                    throw new NotImplementedException(Ex.Message);

                }

}

}

}
Step 2: Now open the Plugin Registration Tool and connect the CRM where you want to add pre-validation operation.
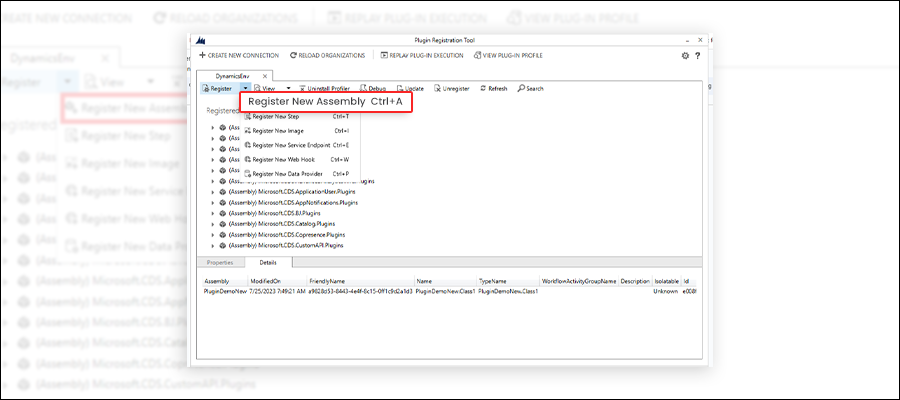
After connecting to the CRM, Click on Register, and there will be a label as Register New assembly.
Step 3: After clicking on Register New Assembly, it will open a pop-up to register assembly, in that pop-up, click on 3 dot (…) and select the .dll file for your project.
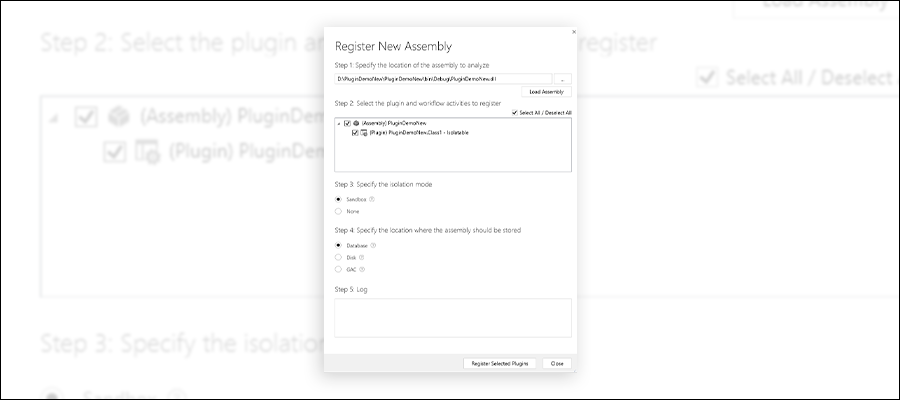
After selecting the dll file, check the Select all checkbox and click on the Register Selected Plugin button.
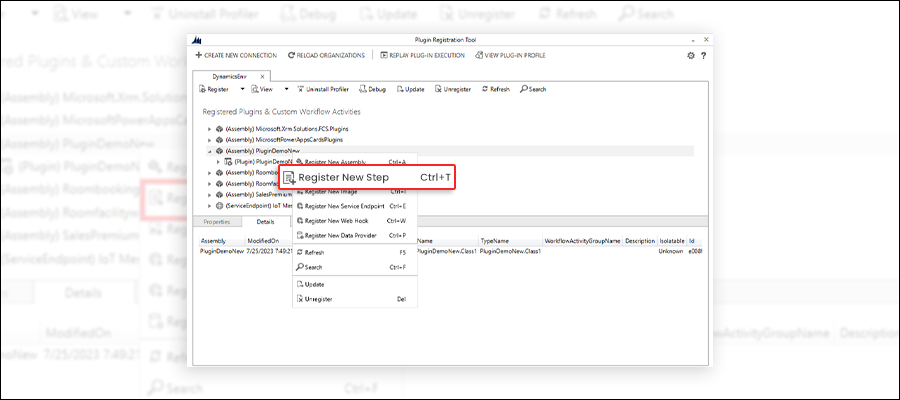
Step 4: Next, locate the assembly and add a new step by clicking the Register New Step.
Step 5: Now, to register the new step, it will open a pop-up.
Keep value as given below :
Message: Update.
Primary Entity: account
Event pipelinestage of execution: Prevalidation step should be chosen.
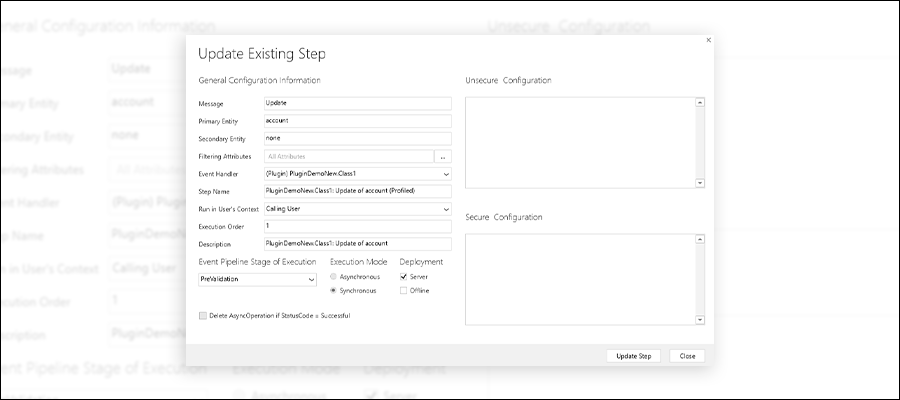
Note as this is pre-validation, it needs to be synchronous and cannot be asynchronous. After filling in the above details, click on the Update Step button.
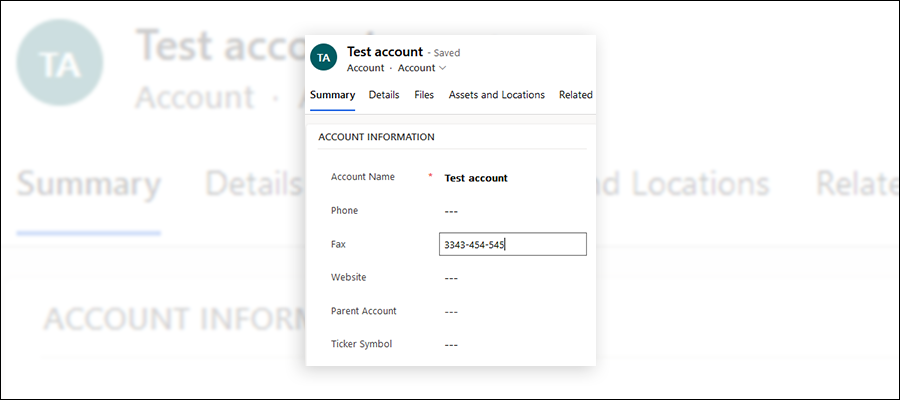
Step 6: Now, we can test this. On an account record, insert a fax number:
Step 7: After saving and refreshing, we can see that our plugin has replaced the fax number. So whenever any account record is updated, it will update the fax number for that record.
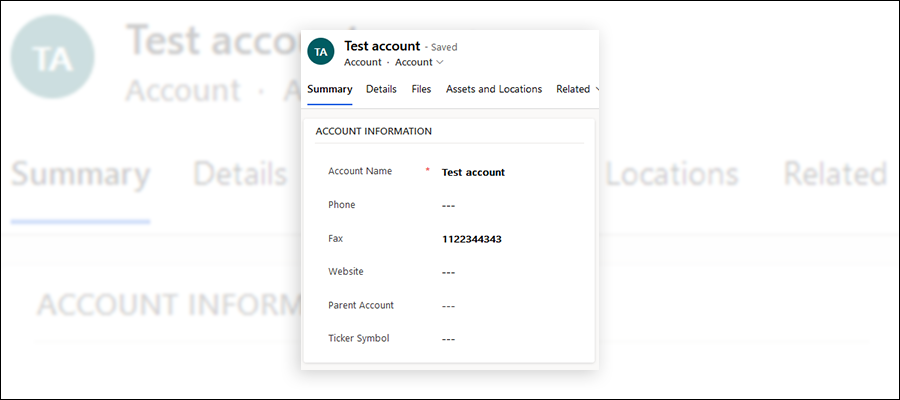
This is how a user can use the Pre-validation stage in the Plugin Registration tool to validate or modify something by plugin registration tool.
All product and company names are trademarks™, registered® or copyright© trademarks of their respective holders. Use of them does not imply any affiliation with or endorsement by them.


