


Not everything in a CRM is a part of a portal. The portal users need not get access to all of it. For this, you need to establish field level access control to manage the nuances of this access.
Let’s talk a look at how to do that with the Dynamics CRM Power Apps portal:
Dynamics CRM Power Apps portal does not provide an option for field level access control. It has to be managed by creating a new entity form and adding the fields that you want in the CRM. Then the relationship between portal side and CRM side entity forms has to be managed via mapping.
Note: When you use any CRM entity form in the web page, all fields & sub grids which are included in the CRM entity form will be displayed on the portal side.
Steps to create Web Page & add form into web page:
Step 1: Go to PowerApps -> Click on Apps.
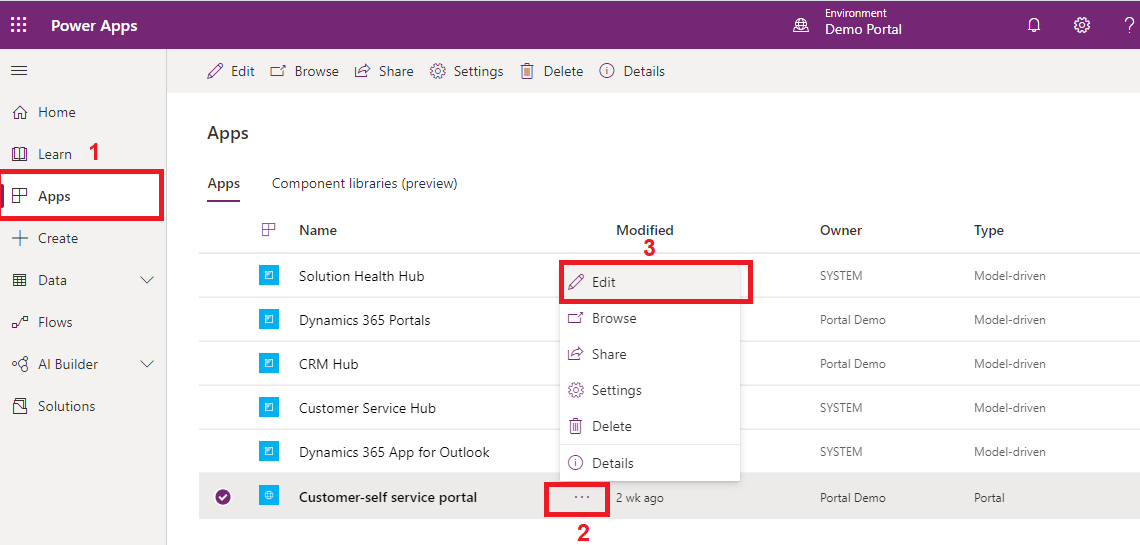
Step 2: Select more commands (…) for the portal and click on Edit. It will open the Power Apps Portal Studio to edit the content and components of the portal.
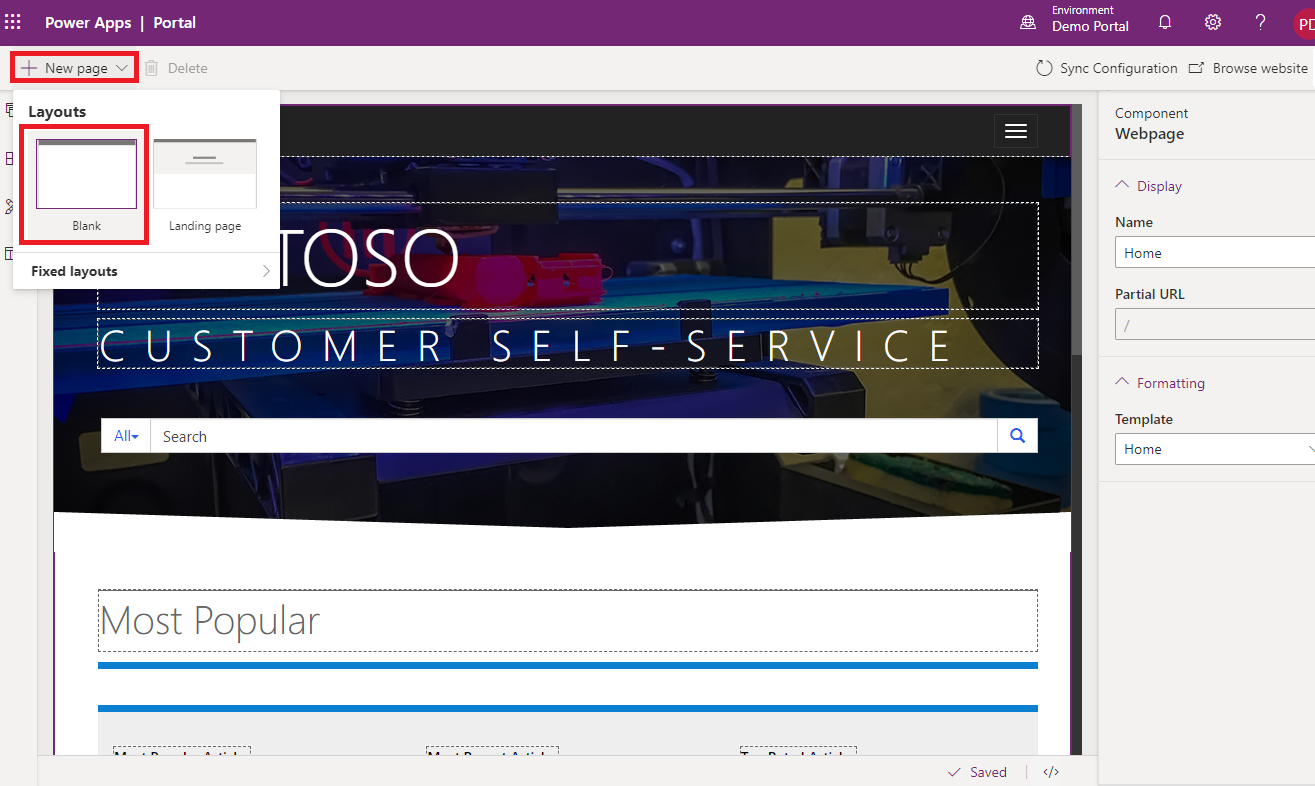
Step 3: Click on New Page -> Blank layout.
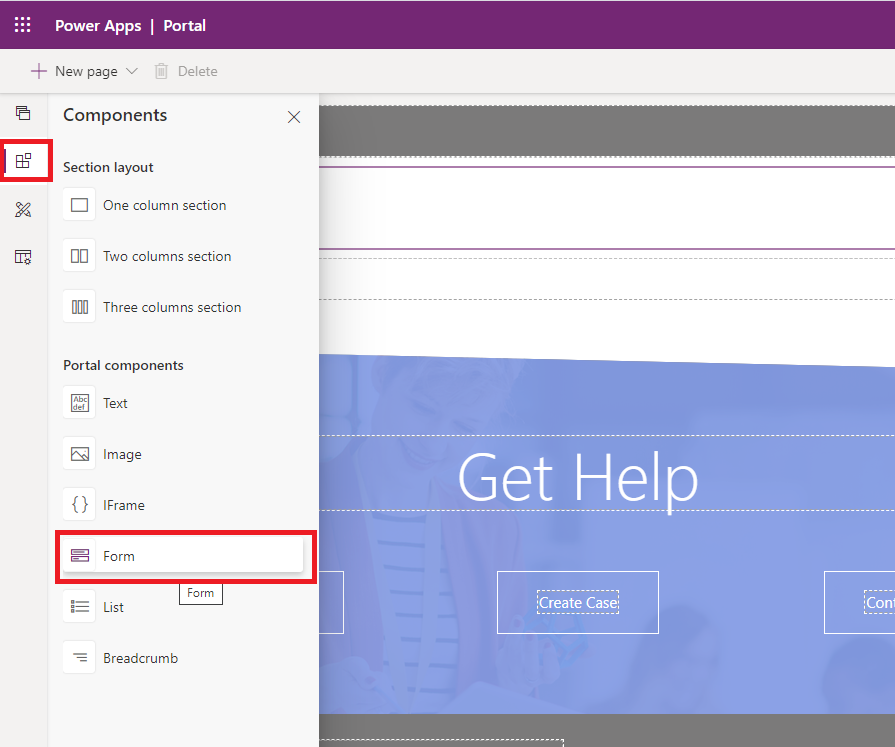
Step 4: Select Components from the toolbelt on the left side of the screen, double click on Form to add form on the web page.
Step 5: From the form component, fill up Form Name, select Entity, select Form Layout. Form Layout is the same as Dynamics CRM Entity Forms.
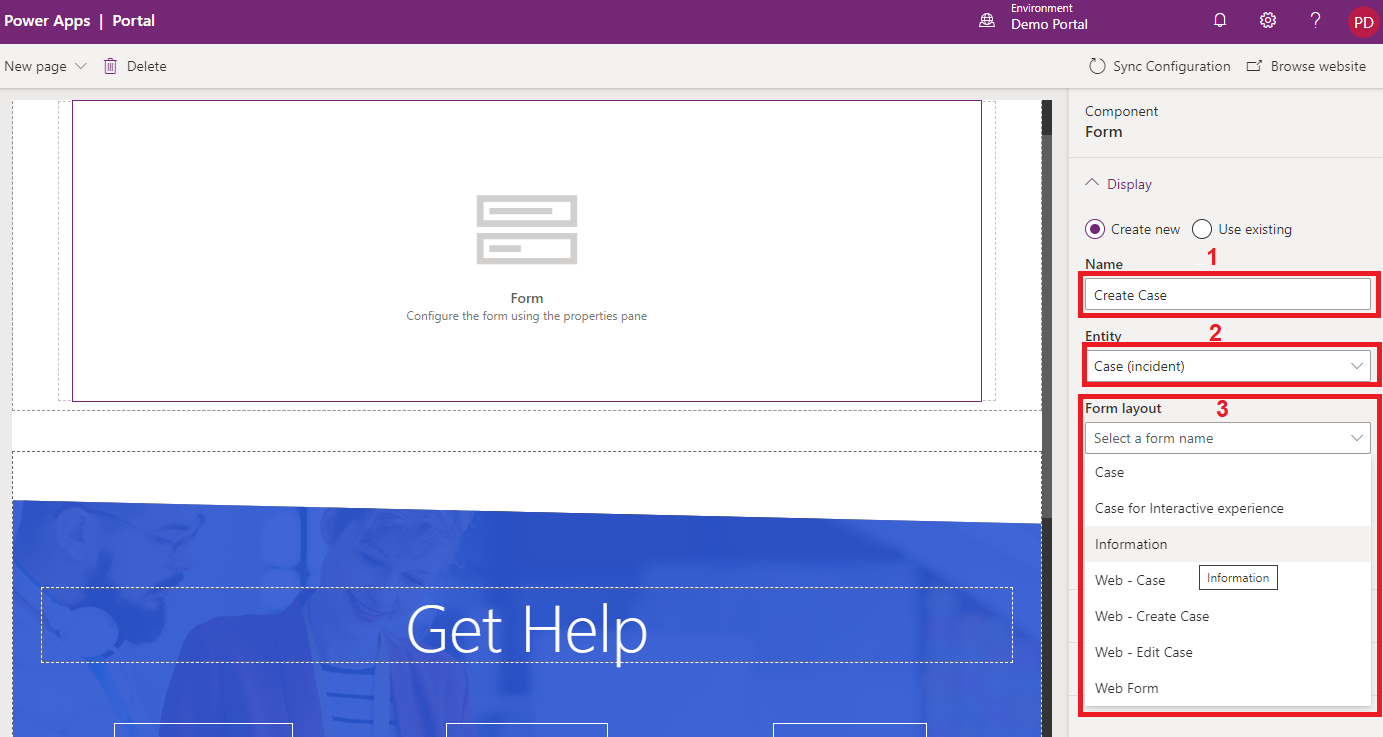
You can customize forms in Dynamics CRM & it will reflect on the portal side.
Dynamics CRM Customer Portal Field Level Access Control:
An easier way to enable field level access on the user side would be via a quick drag and drop function. This eliminates confusion, and there is a clarity about the layout. It can also be reused since there is only the task of dragging away fields.
Set Portal Layout steps:
Customer portal provides the feature to manage Dynamics CRM module’s accessibility & field accessibility for their WordPress portal users. You can decide which module’s access should be provided to which customer by creating a role and assigning modules or fields to that role.
To let your customers avail Dynamics CRM modules from your WordPress portal, it is mandatory to set Portal Layouts for each accessible module. Customer Portal plug-in provides facility to set Portal Layouts for Dynamics CRM modules.
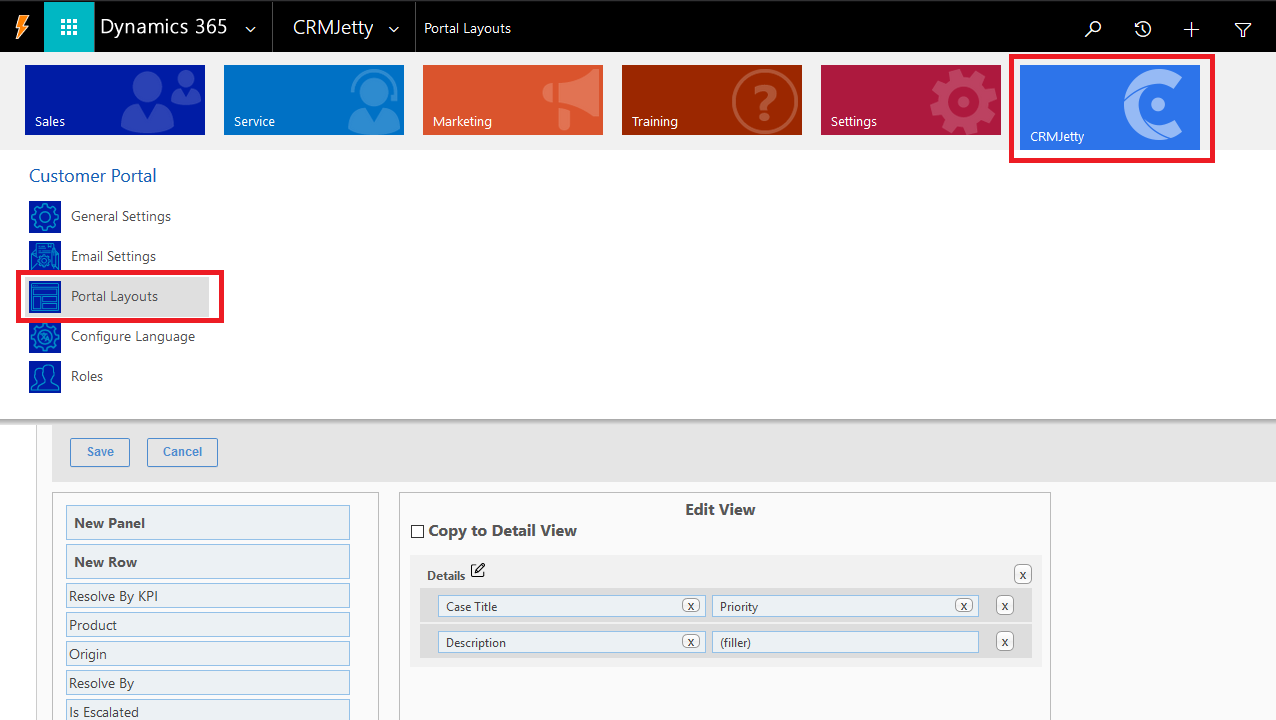
Step 1: To create a role in CRM, Click on Sales -> CRMJetty tile.
For Unified Interface from bottom left click on Sales -> CRMJetty
Step 2: To set Portal layouts, click on the Portal Layoutsoption. This will open up the Portal Layout Setting page.
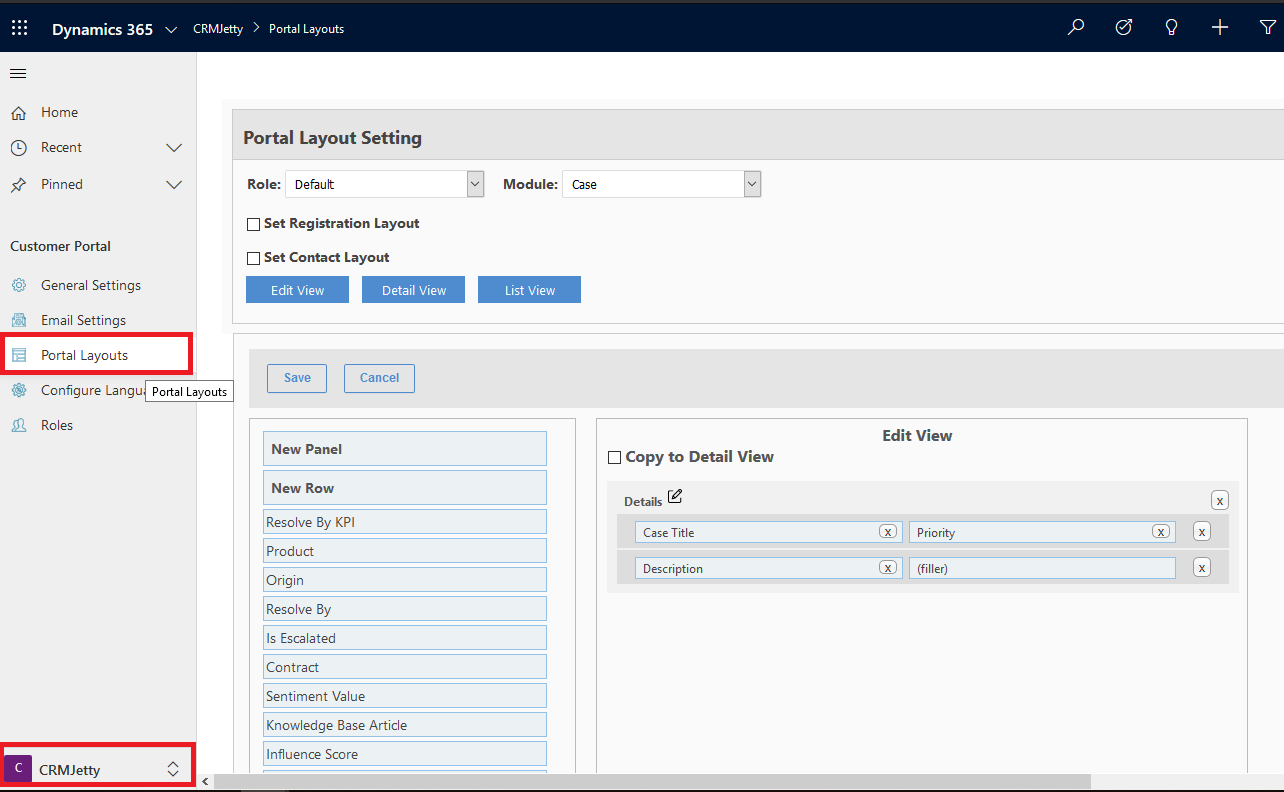
Step 3: Select a role from the Select Roles dropdown menu and select your desired Module for layout setting.
Step 4: Set layouts for Edit view, Detail view, and List view. Drag and drop fields from the left column to the right. After populating the layout, click on the Save button to save the layout.
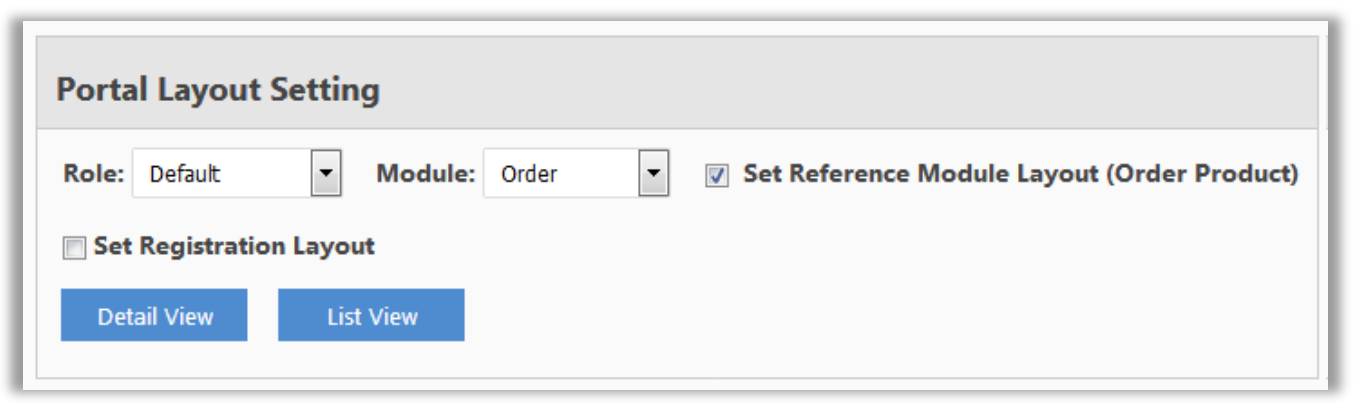
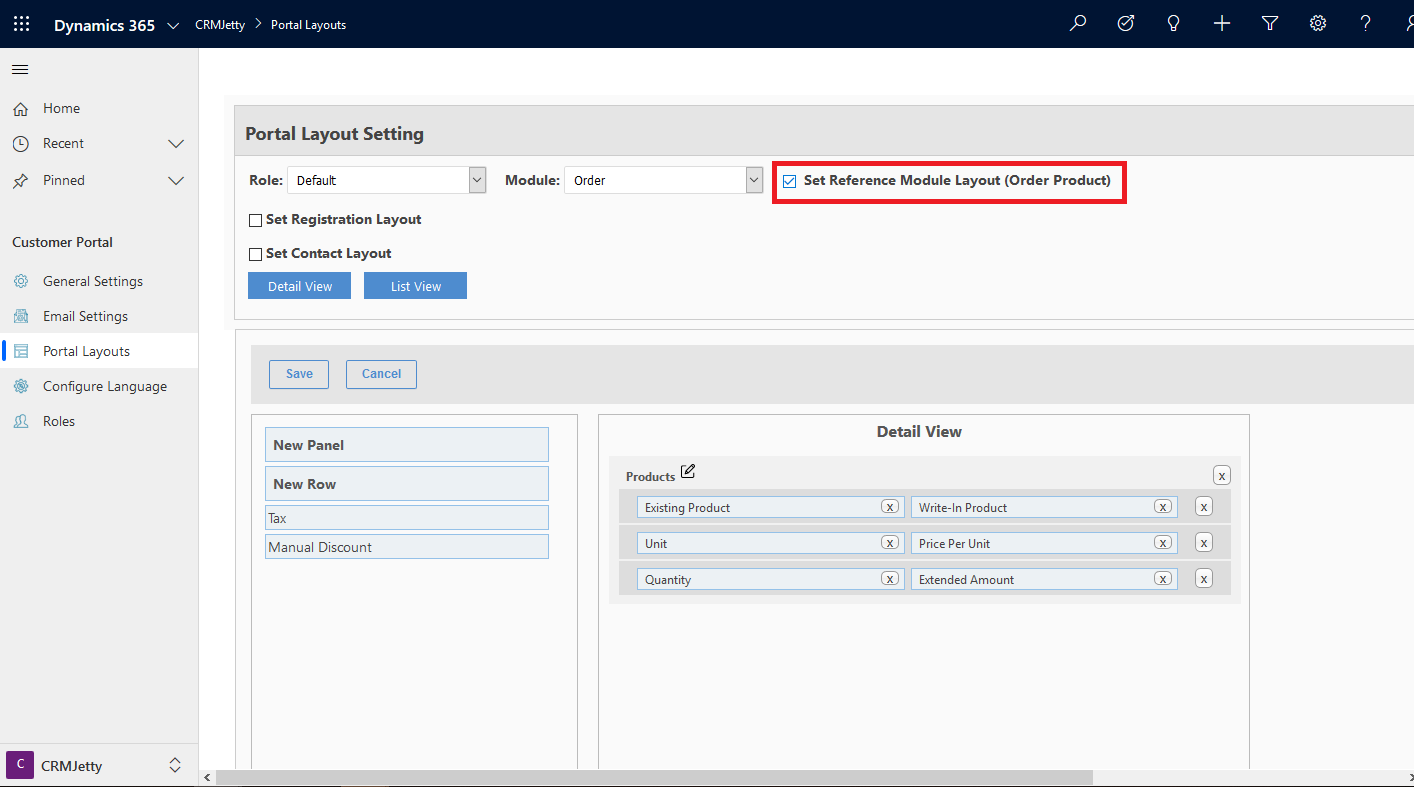
Step 5: You can also set a Detail view layout for the reference module. A check box will appear on selecting a module that has a reference module associated with it. Check the box to set Detail view layout for reference modules.
And just like that, you can manage the whole flow in three simple steps. Depending on the complexity you prefer, you can opt for the default option, or the third party portal.
All product and company names are trademarks™, registered® or copyright© trademarks of their respective holders. Use of them does not imply any affiliation with or endorsement by them.


