


Configuring Advanced Form for single or multiple entities in PowerApps Portal is now possible! You can save advanced forms for each entity making it easier for you to track and manage them.
To configure the advanced form follow the below steps:
To configure the advanced form, log in to https://make.powerapps.com and click on Apps from the left menu.
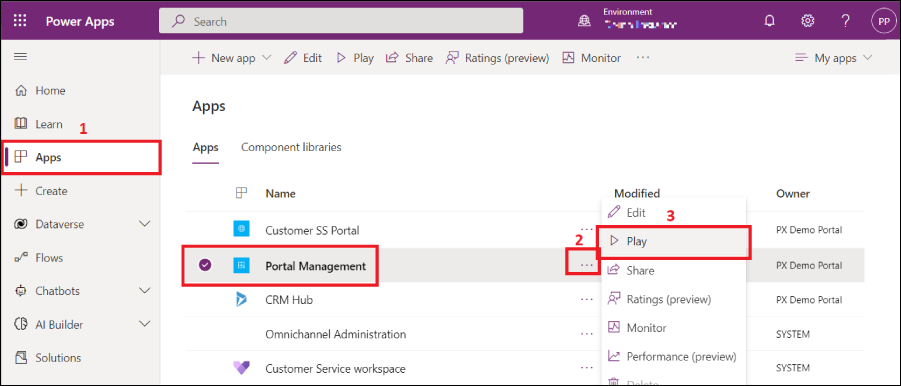
Now from the list of Apps, click on the Portal Management App context menu and click on Play to open Portal Management App.
The Portal Management App will open.
First, create a Web Template and Page template for the Advanced form page. You can use the existing Web and Page templates also.
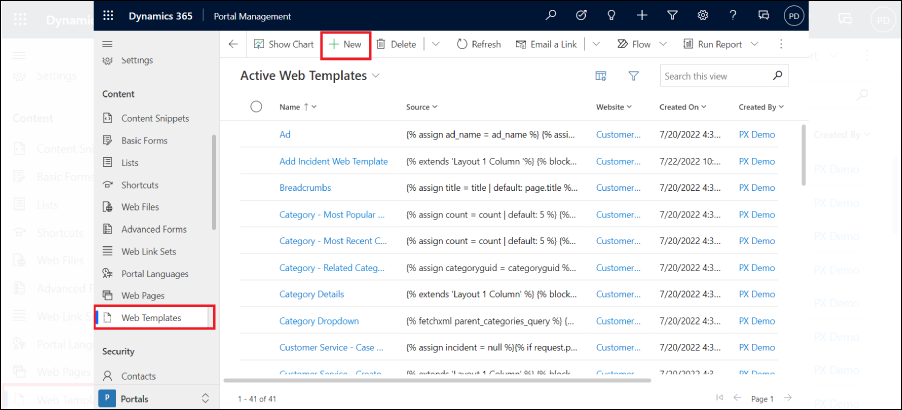
To create a Web Template click on Web Template from the left menu then click on New.
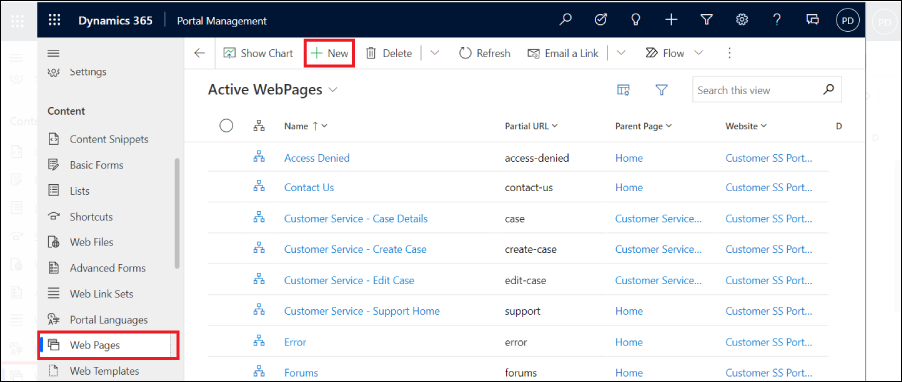
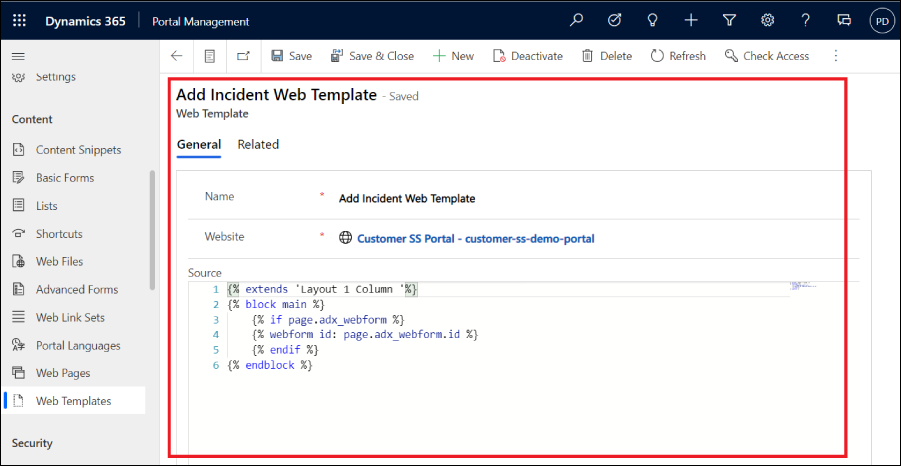
The Web Template form will be open, add name, select website and in source code added for load advanced form.
Now open a list in which you want to configure an advanced filter. i.e. Customer – Service Case List. Save the form.
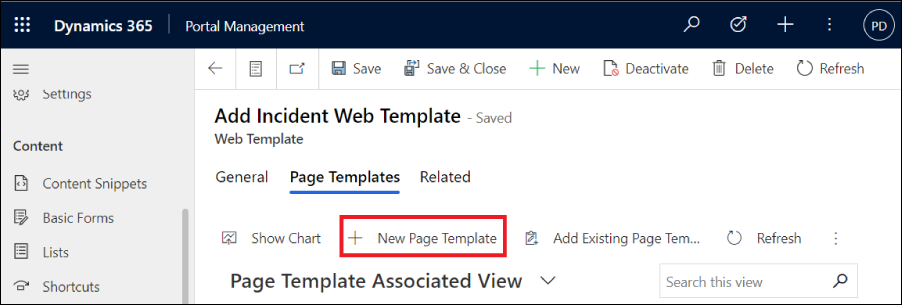
Now to add Page Template related to Web Template, click on Related -> Page Templates.
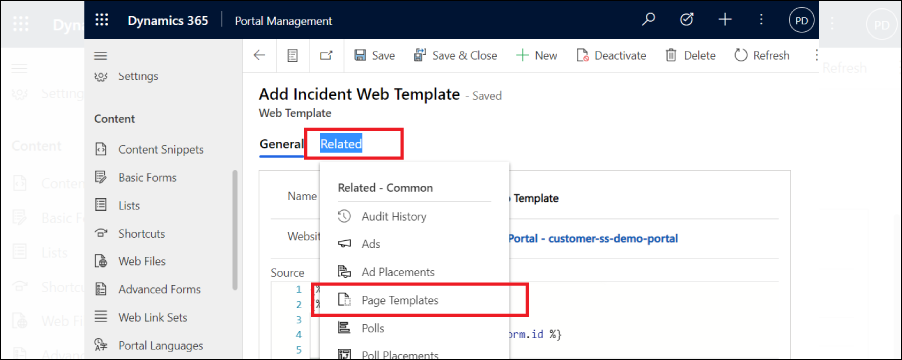
In the Page Templates section click on New PageTemplate to add new page template.
In Page Template form fill up the Name, Website, Select Type Web Template and select WebTemplate which was created in the previous step and Save the form.
Now to create an Advanced form, click on Advanced Forms from the left menu.
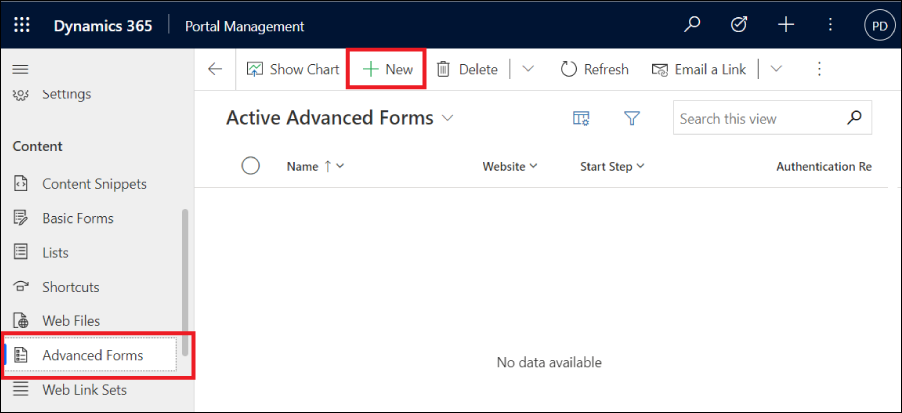
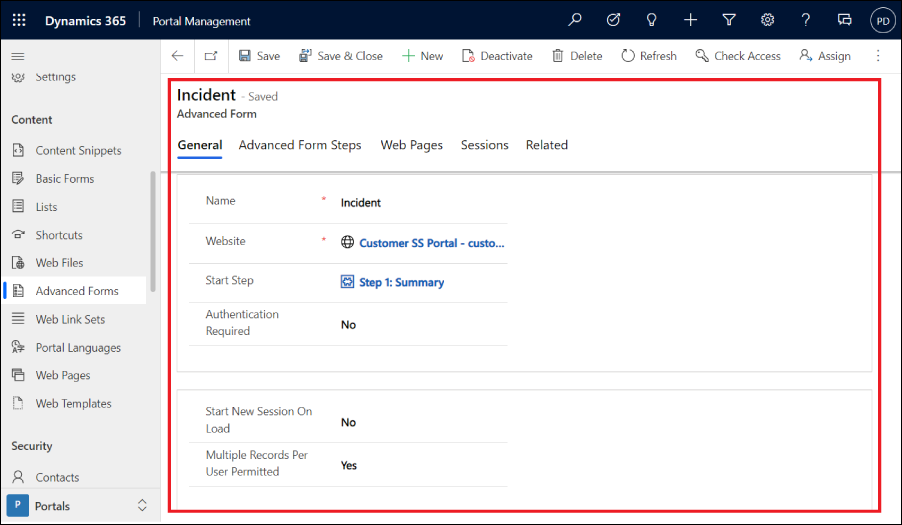
In create form, fill up the below information:
- Name: Provide name of Advanced form
- Website: Select portal website
- Start Step: Select start step of form. Note: this will be configured after adding Advanced Form steps.
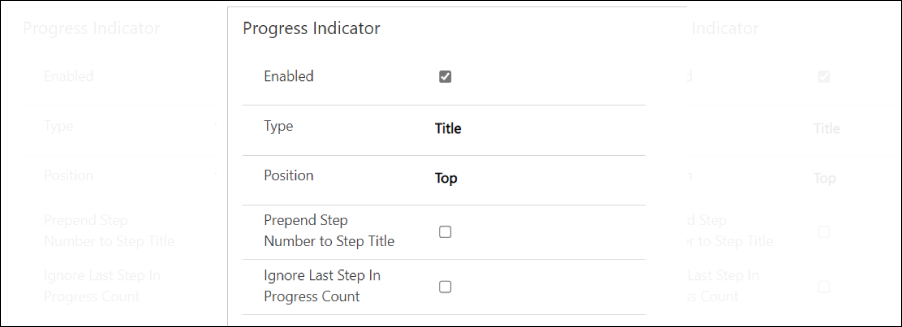
- Under Progress Indicator section configure form steps or progressbar.
- Enabled: to enable progress bar check the checkbox.
- Type: Select display type i.e. Title, Numeric or ProgressBar
- Position: Select the position of form step/progress in form.i.e.Top, Bottom, Left, Right.
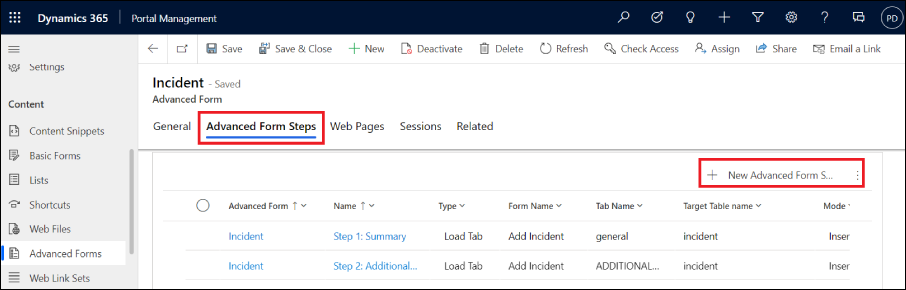
After filter configuration, save the record and to create form steps click on Advanced Form Steps -> New Advanced Form Step button.
In the form fill up the below information:
- Name: Provide step name.
- Advanced Form: It will be created in an Advanced form.
- Type: Select type. Available types:
- Load Form type: It displays properties of forms.
- Load Tab type: It displays properties of tabs.
- Conditional type: it displays properties for specifying expressions to be evaluated for conditional branching.The first step can’t be of type “Condition”.
- Redirect type: It displays the settings appropriate for configuring a website redirection.

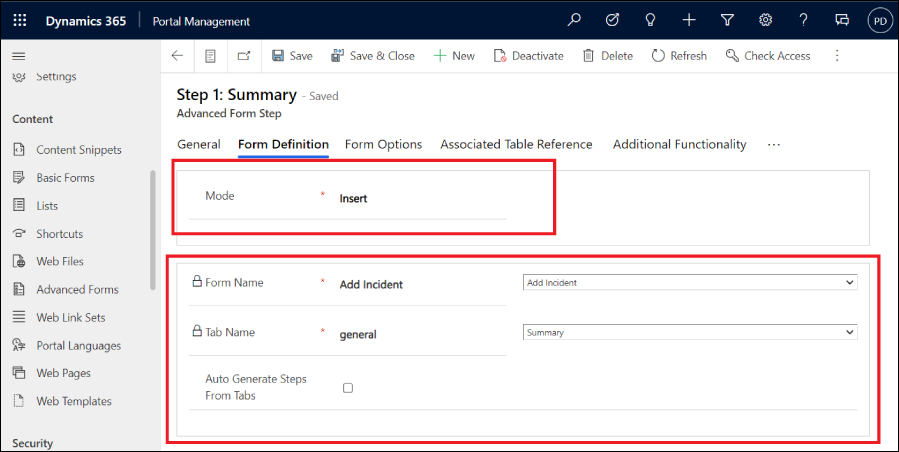
Now click on Form Definition to configure form/tab related settings.
Select Mode (Insert/Edit/Read Only), in Form Name select entity form and then select entity form tab. In case you configure Step Type Load Form then you don’t need to set Form Tab.
Save the record and add another step.
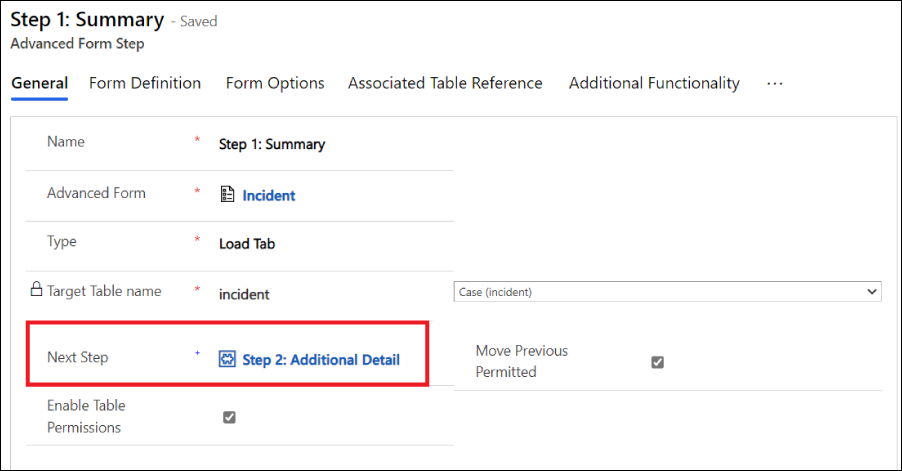
After adding all steps, update those steps and set Next step field. This will load the next step when the user clicks on Next button.
After configuring all steps, in Advanced Form record, general tab-> configure Start Step field. It will load from the first step which is configured in the Start Step field.
Now to configure Web Page for Advanced Form, click on -> Web Pages from the left menu.
Click on New. The form will open. Fill up the below information:
- Name: Provide Web Page name.
- Website: Select portal website.
- Parent Page: Select Parent Page you want to create the current page as a child page of any existing page.
- Partial URL: Add partial URL for the page.
- Page Template: Select Page Template which is created previously or you can select an existing page template.
- Publishing State: Select Publishing state as Published.
- Advanced Form: Select Advanced form which is created in the previous step.
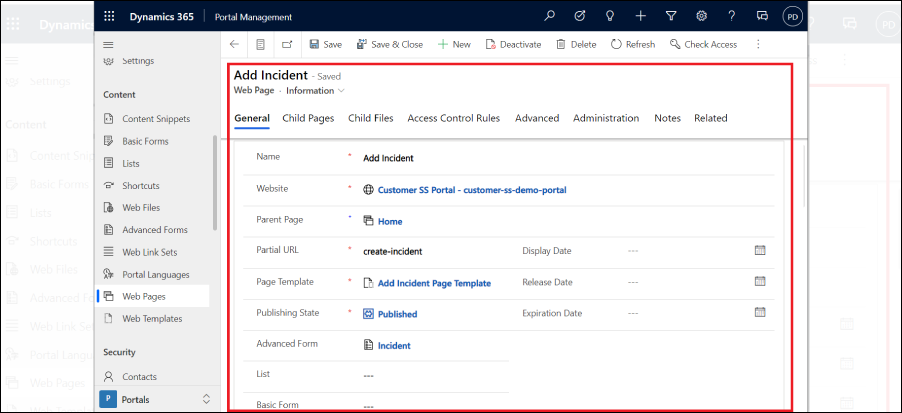
Save the form.
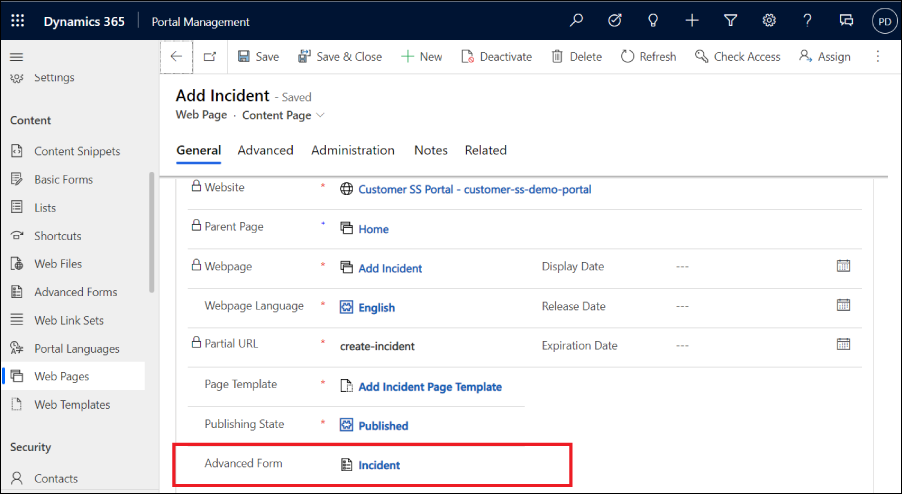
After save the form, in Localize content section, the webpage record will be created. Edit this record and verify/change the Advanced Form field to Advanced form which was created previously.
Now browse the web form by adding partial URL in portal domain i.e.
https://< portal-url>.com/create-case.
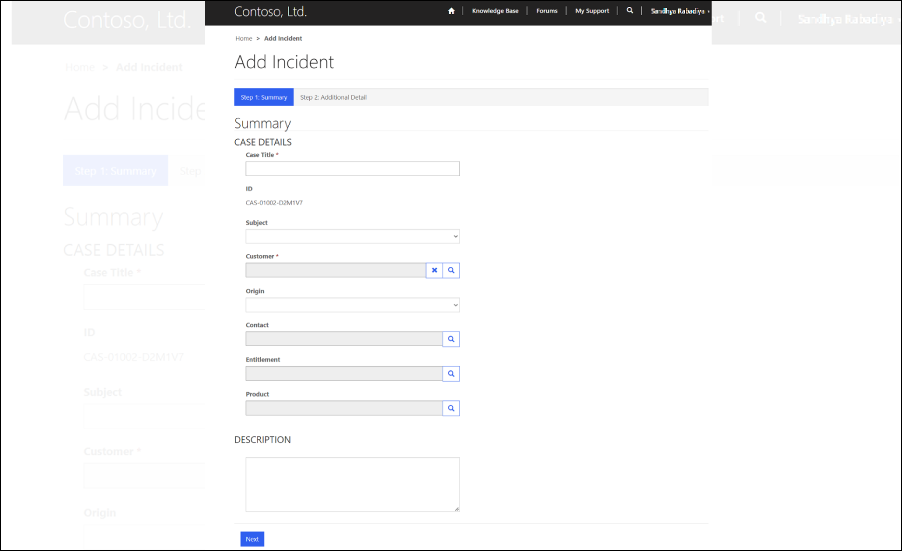
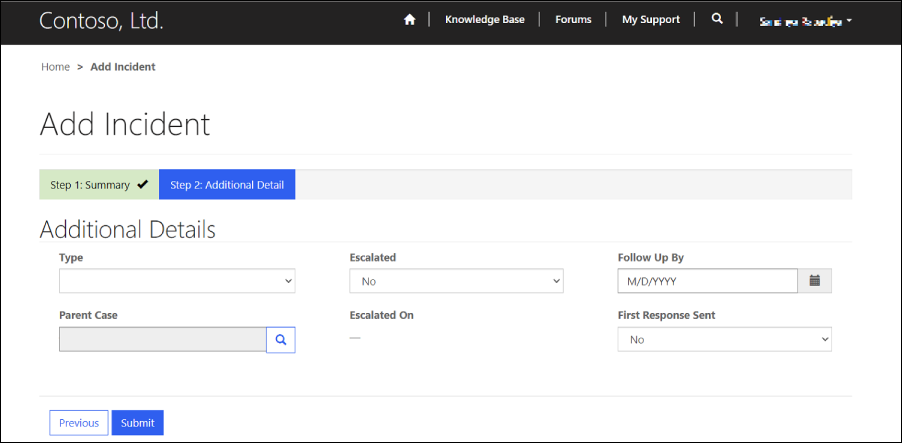
The from will load with steps.
All product and company names are trademarks™, registered® or copyright© trademarks of their respective holders. Use of them does not imply any affiliation with or endorsement by them.


