


This article explains the step-by-step procedure to register a Microsoft Dynamics 365 app with Azure Active Directory for oAuth (open authentication).
The registration of an app with Azure Active Directory helps serve the following purposes.
- Integration of the application and service with Azure AD.
- Generation of the token for authentication of the application.
- Use of Azure AD’s capabilities
- Getting the Client ID and Secret Key.
The prerequisites for this registration are:
- The user should have a functional Microsoft Azure Active Directory and a Microsoft Dynamics CRM License to access API.
- The user should also have functional webMethods.io Integration Cloud tenant.
Steps to Register Azure AD App for oAuth
Here are the steps to follow to register your Microsoft Dynamics CRM application with Azure AD.
Steps to Register Azure AD App for oAuth
1. Login to Dynamics 365 and open the URL https://portal.azure.com/ in a new tab.
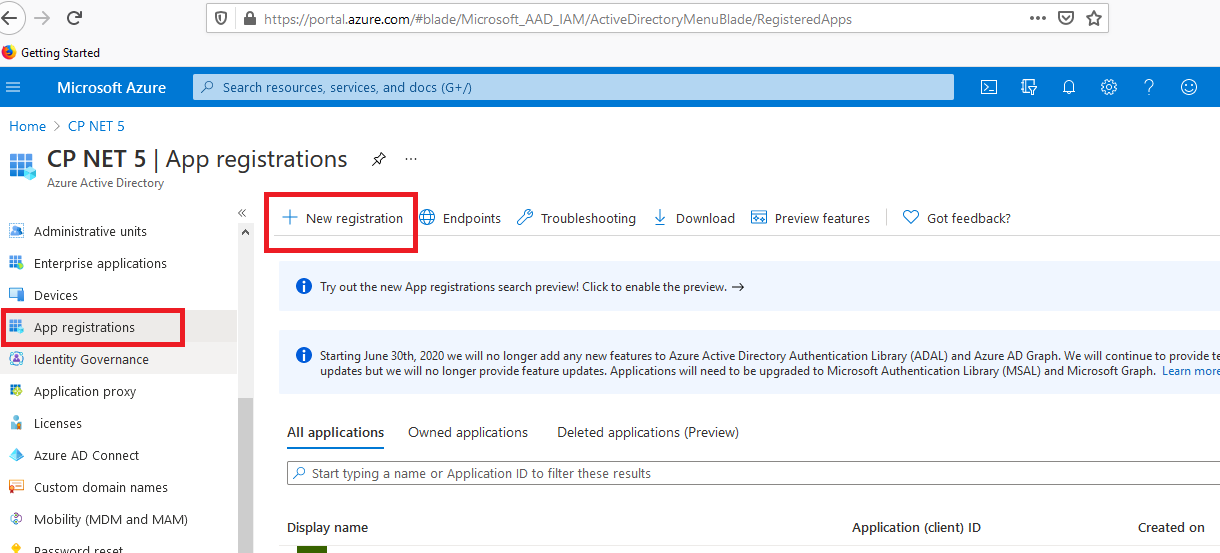
2. When the Azure portal home page opens, search for Azure Active Directory in the search bar. bar. Click on the Azure Active Directory to open it.

3. To create the app, click on App Register → New Registration.
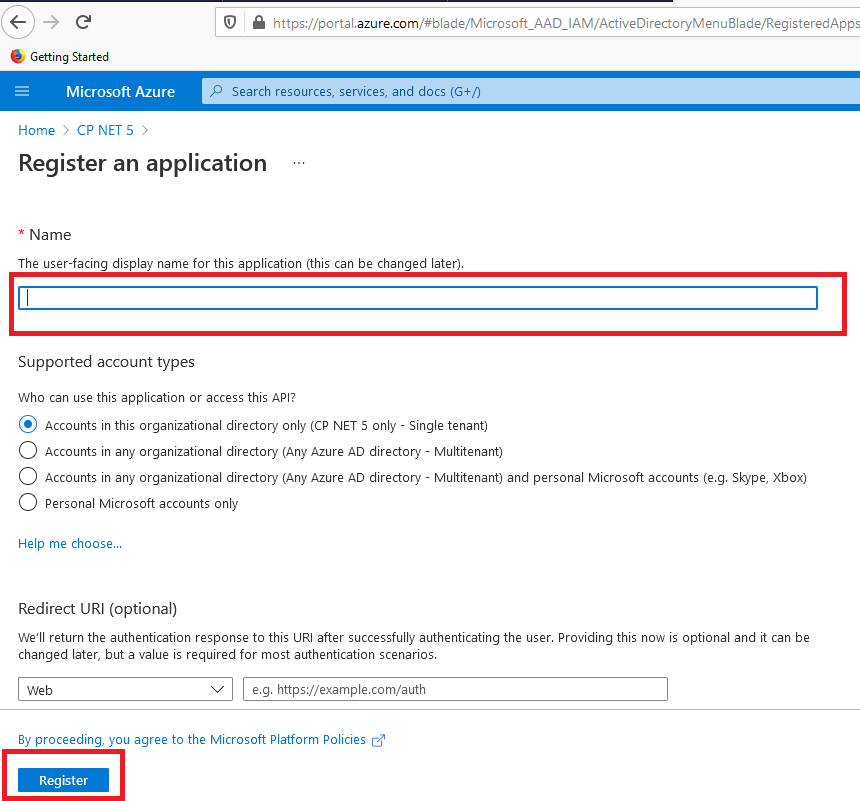
4. The new app registration form will open, in the form enter the app name and click on Register.
5. To provide Dynamics 365 API permission click on API permission from the left side menu then click on Add a Permission.
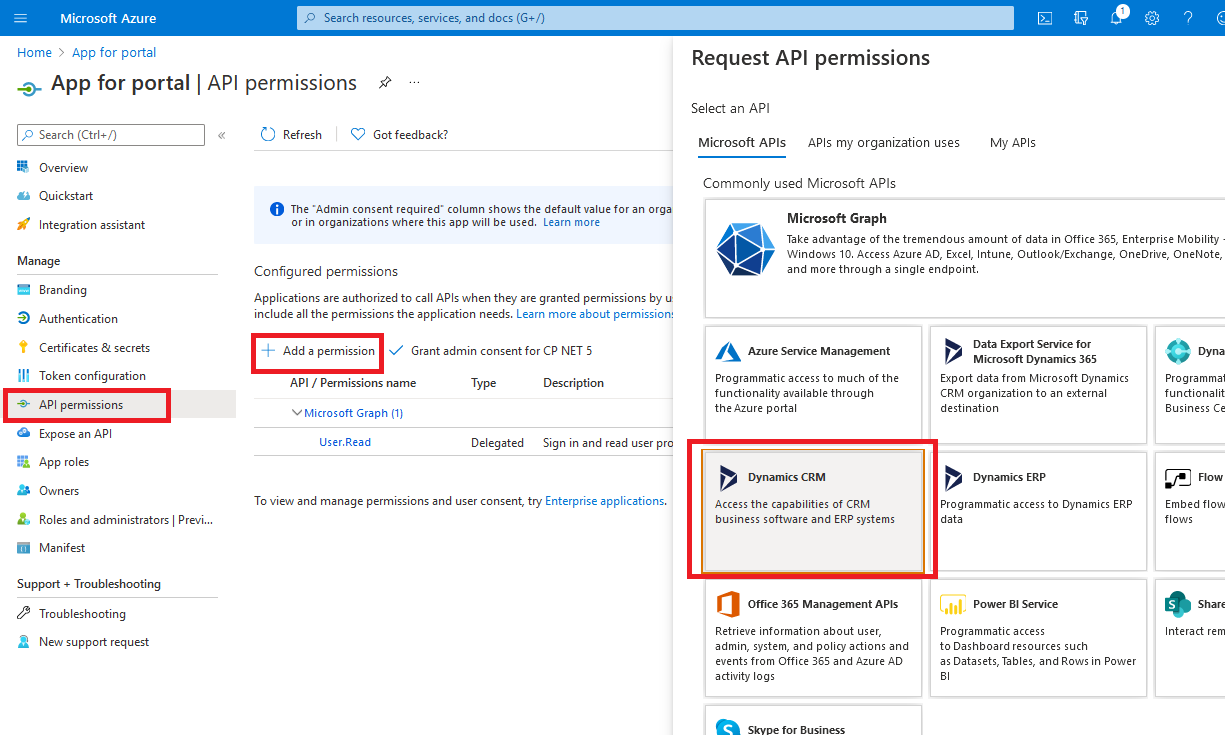
6. The side panel will open from where you can preview Dynamics CRM permission by clicking on “Dynamics CRM”.
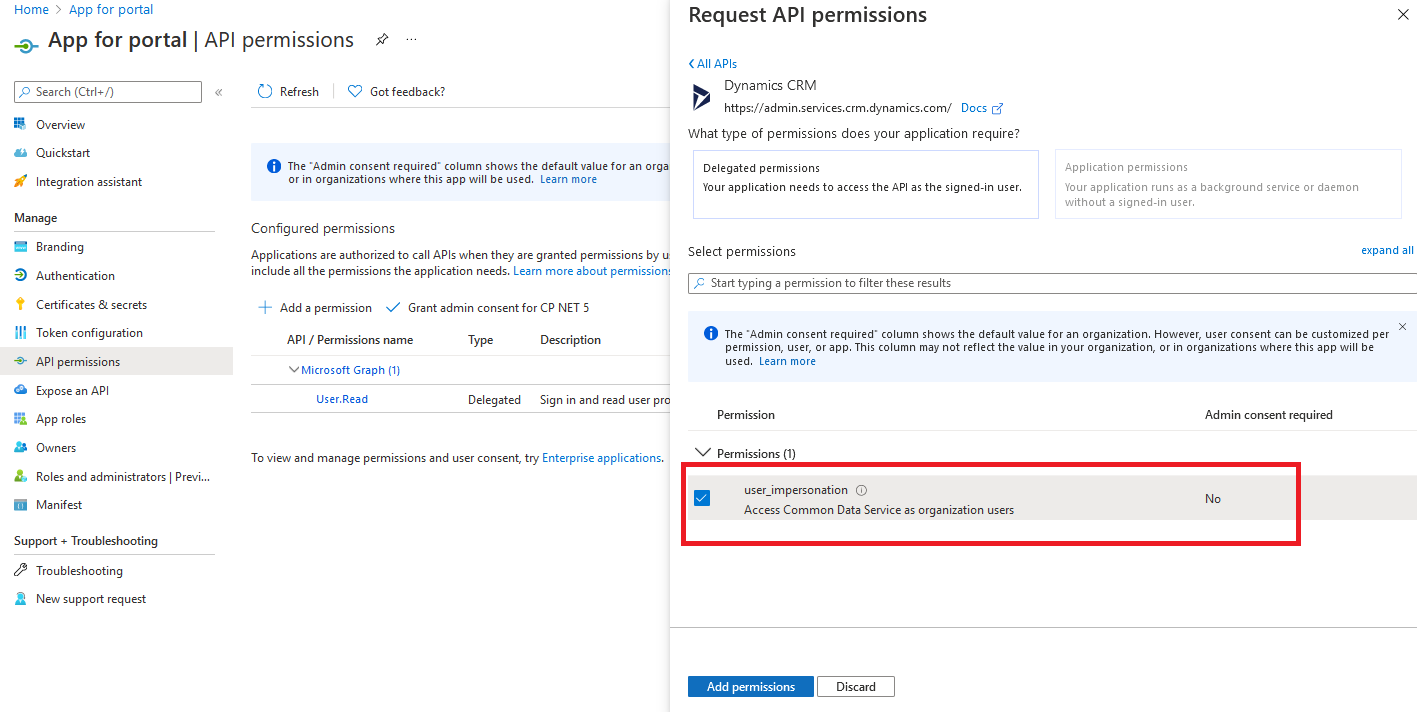
7. In the second screen, check the user_impersonation checkbox and then click on Add permission.
8. The permission for CRM common data service is added to the App.
9. After that, to create a client secret for the app, click on Certificates & Secrets from the left menu and then click on New client secret.
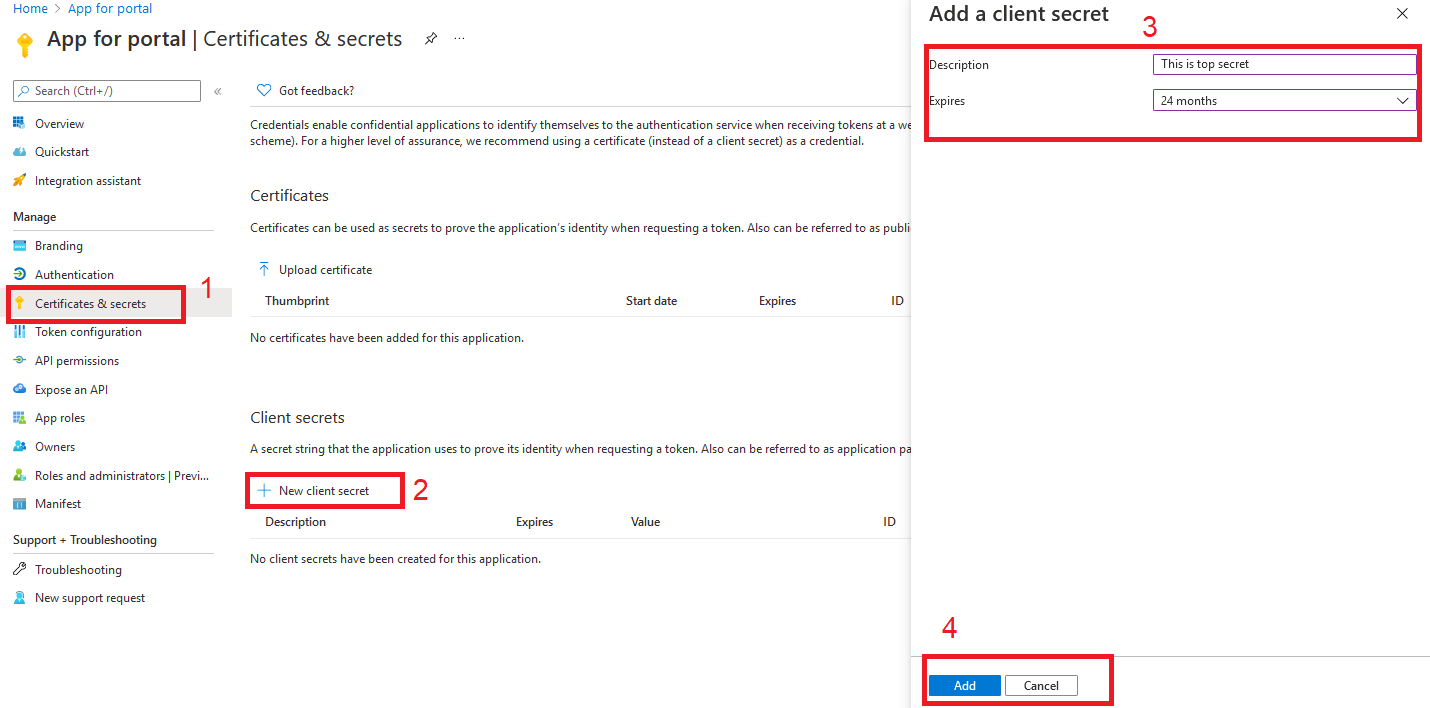
10. Add description and select client secret expiry time, click on Add to create client secret.
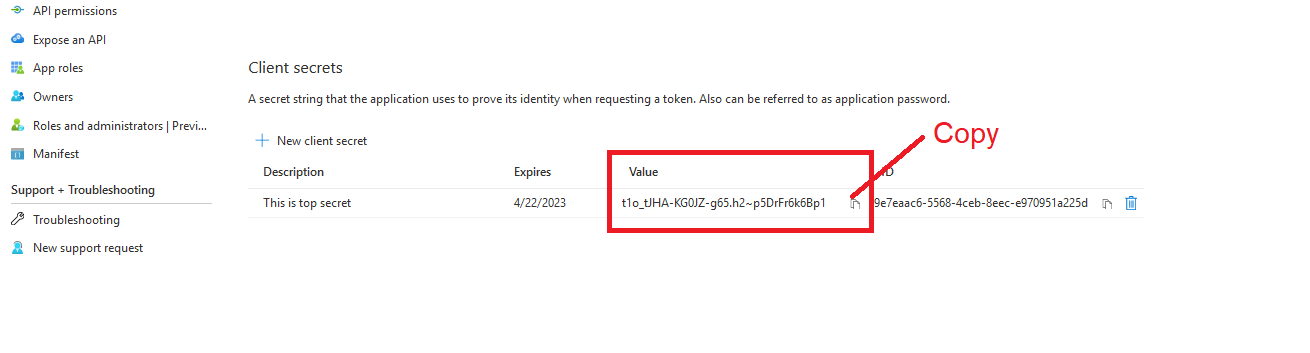
11. After successfully adding client secret, it will display in the client secret list, from where you need to copy client secret value (one-time copyable) for oAuth.
Create Application User and Assign Roles
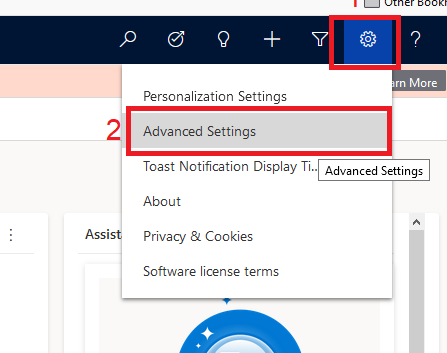
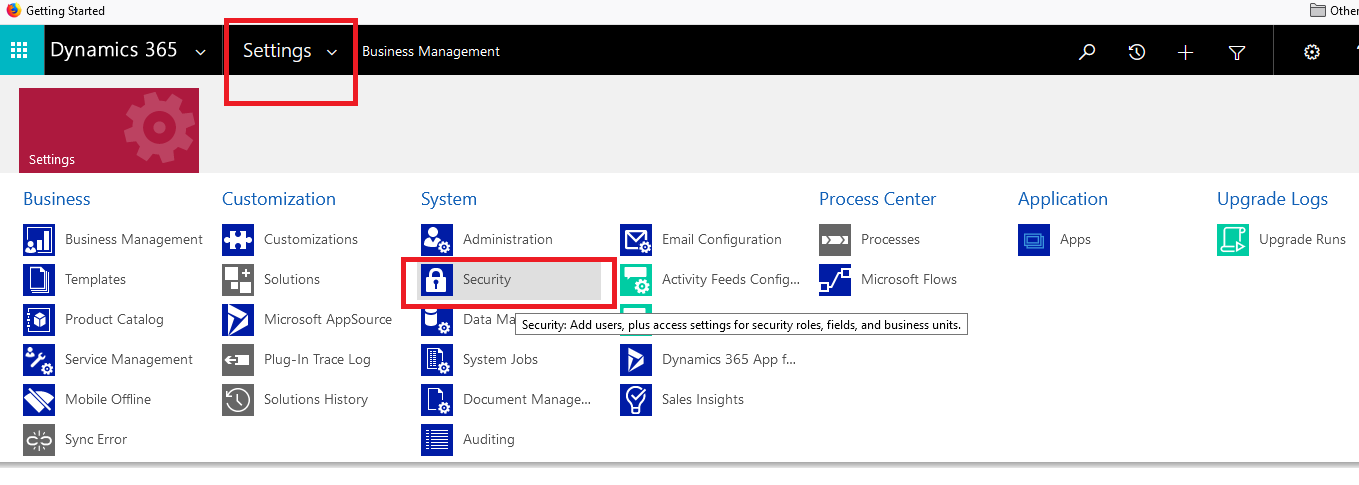
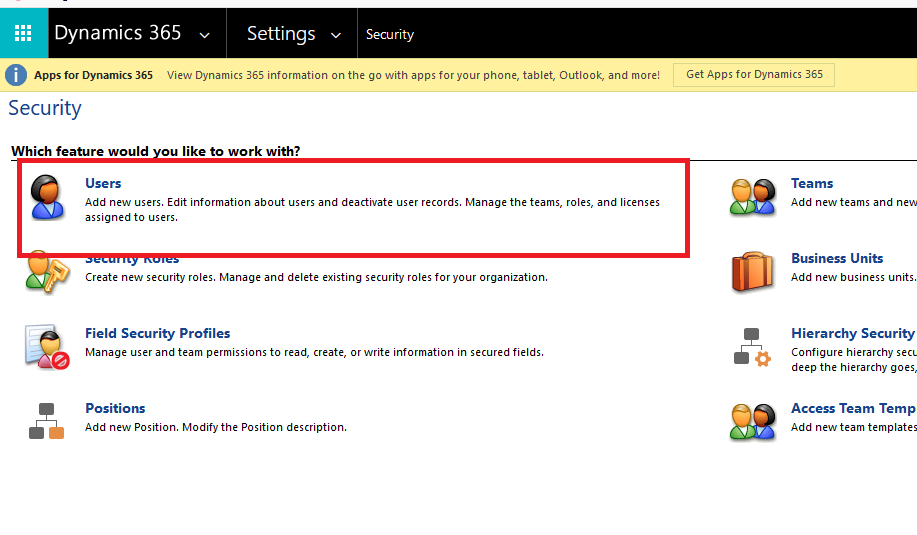
1. To create an application user, go to Settings -> Advanced Settings -> Settings -> Security.
2. Then click on Users.
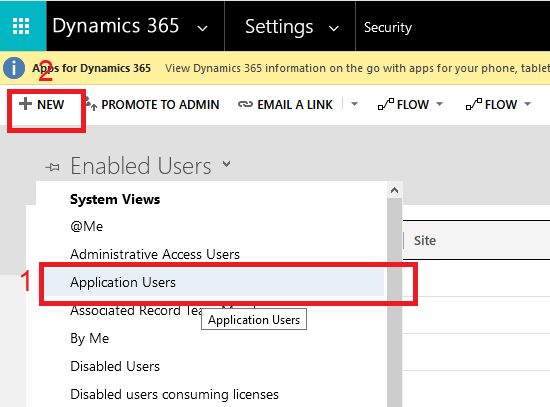
3. The user list will open. From the users’ list, first, change the view to Application Users, and then click on New.
4. The “Create User” form will open. (Note: Make sure the form is Application user form if it isn’t, then change Form view to Application user form).
5. In Create User Form, add Application ID, and save the record.
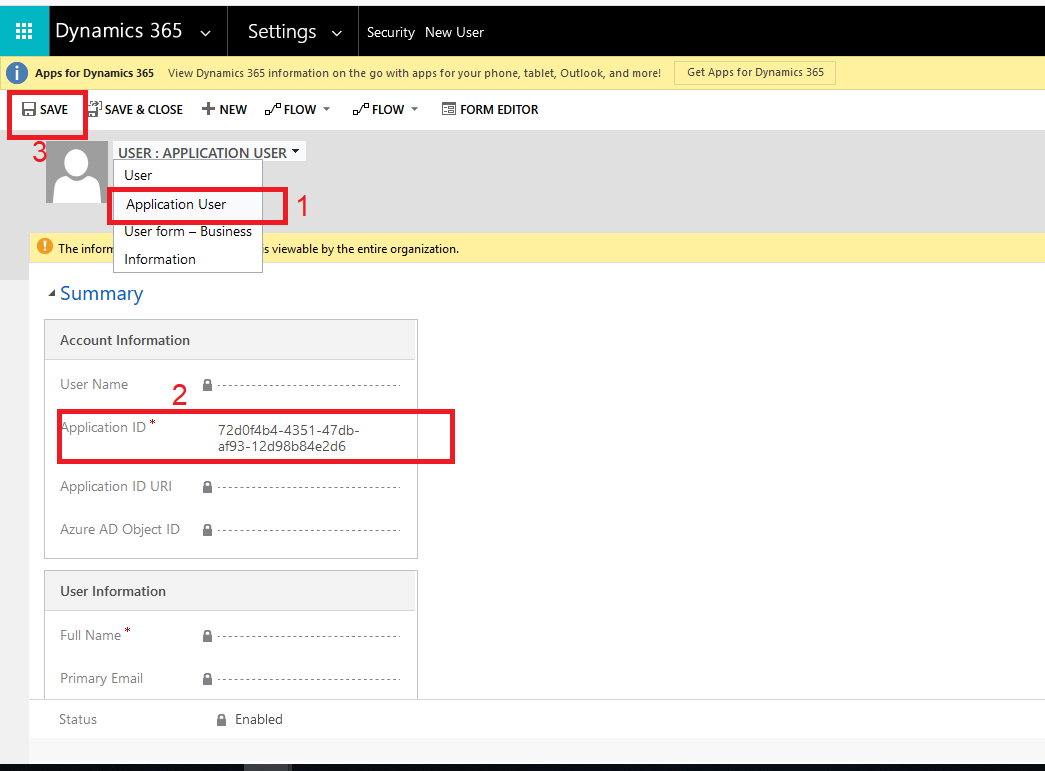
6. After you save the record successfully, the app details automatically fill up in the application user form.
7. Provide System Administrator and System Customizer roles to the created application user.
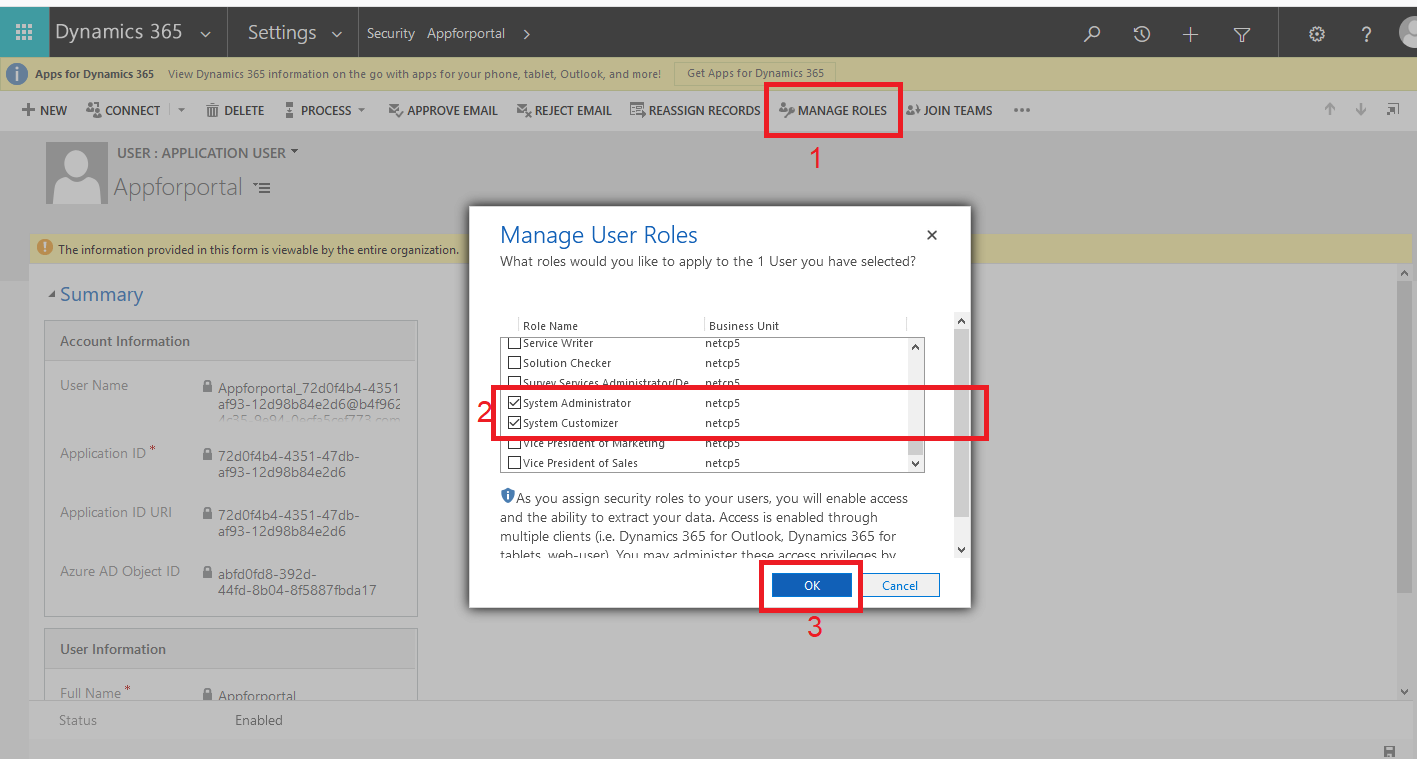
8. After you assign the role to the Application user, you can use your app ID and Client Secrets to authenticate CRM in any Dynamics 365 portal.
The above-mentioned procedure can help you register any Dynamics 365 app with the Azure AD app for oAuth.
All product and company names are trademarks™, registered® or copyright© trademarks of their respective holders. Use of them does not imply any affiliation with or endorsement by them.


