


Registration page needs to be easy and quick to fill. It also needs to cover all the necessary information. Customizing your registration page is the best way you can add all and only necessary features.
In this blog we will see how to customize the registration page in PowerApps Portal.
To customize the registration page and add fields, follow the below steps:
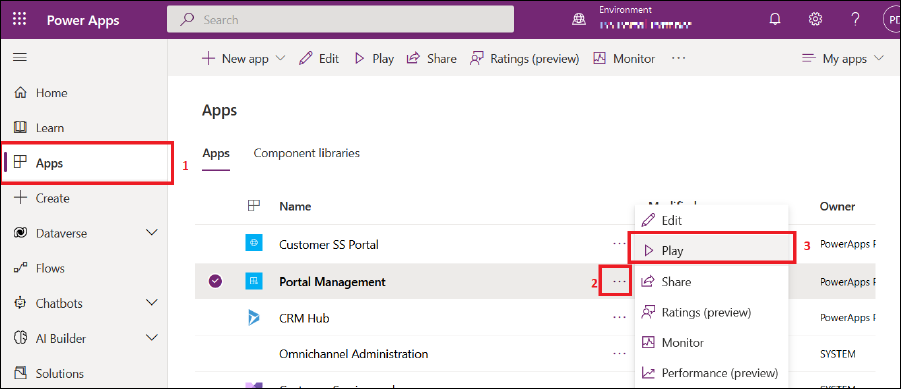
- First we will add fields to the registration page, so log in to PowerApps and open the Portal Management App from the Apps.

- In the Portal Management App -> click on Content Snippets and create a new content snippet for registration with the below details.
- Name: Account/Register/PageCopy
- Type: HTML
- Display Name: Account/Register/PageCopy
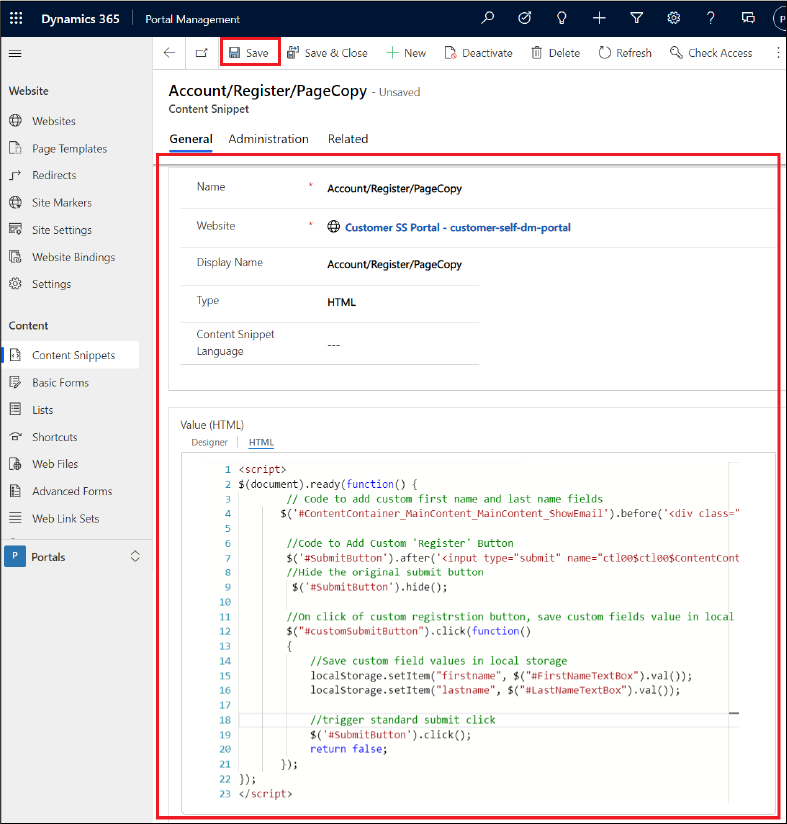
- Add custom code to append custom fields on the registration page in the Value(HTML) section. And save that record.
- JS Code:
<script>
$(document).ready(function() {
// Code to add custom first name and last name fields
$(‘#ContentContainer_MainContent_MainContent_ShowEmail’).before(‘<div class=”form-group”><label class=”col-sm-4 control-label required” for=”FirstNameTextBox”><span id=”ContentContainer_MainContent_MainContent_FirstNameLabel”><span class=”xrm-editable-text xrm-attribute”><span class=”xrm-attribute-value”>First Name</span></span></span></label><div class=”col-sm-8″><input name=”ctl00$ctl00$ContentContainer$MainContent$MainContent$FirstNameTextBox” type=”text” autocomplete=”off” id=”FirstNameTextBox” class=”form-control” aria-required=”true”></div></div><div class=”form-group”><label class=”col-sm-4 control-label required” for=”LastNameTextBox”><span id=”ContentContainer_MainContent_MainContent_LastNameLabel”><span class=”xrm-editable-text xrm-attribute”><span class=”xrm-attribute-value”>Last Name</span></span></span></label><div class=”col-sm-8″><input name=”ctl00$ctl00$ContentContainer$MainContent$MainContent$LastNameTextBox” type=”text” autocomplete=”off” id=”LastNameTextBox” class=”form-control” aria-required=”true”></div></div>’);
//Code to Add Custom ‘Register’ Button
$(‘#SubmitButton’).after(‘<input type=”submit” name=”ctl00$ctl00$ContentContainer$MainContent$MainContent$customSubmitButton” value=”Register” id=”customSubmitButton” class=”btn btn-primary”>’);
//Hide the original submit button
$(‘#SubmitButton’).hide();
//On click of custom registrstion button, save custom fields value in local storage and trigger standard register button to execute further registration process
$(“#customSubmitButton”).click(function()
{
//Save custom field values in local storage
localStorage.setItem(“firstname”, $(“#FirstNameTextBox”).val());
localStorage.setItem(“lastname”, $(“#LastNameTextBox”).val());
//trigger standard submit click
$(‘#SubmitButton’).click();
return false;
});
});
</script>
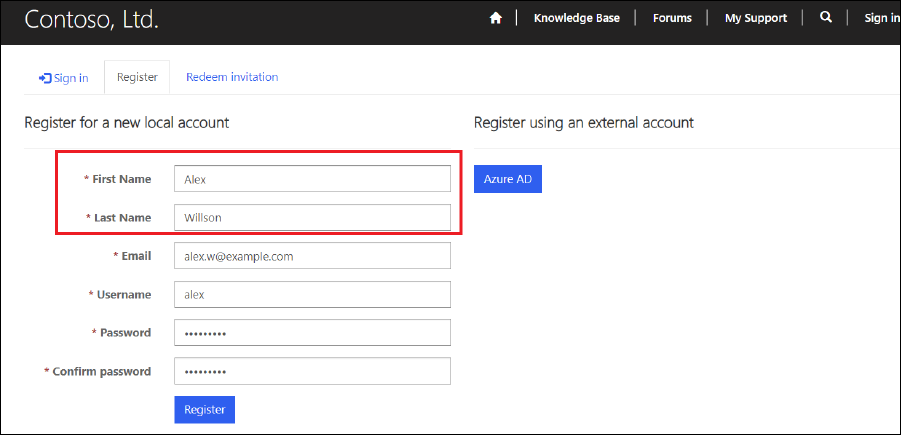
- Now clear the portal cache and you will see Firstname and Lastname fields on registration page. You can configure validations and other actions using custom JS on custom fields.
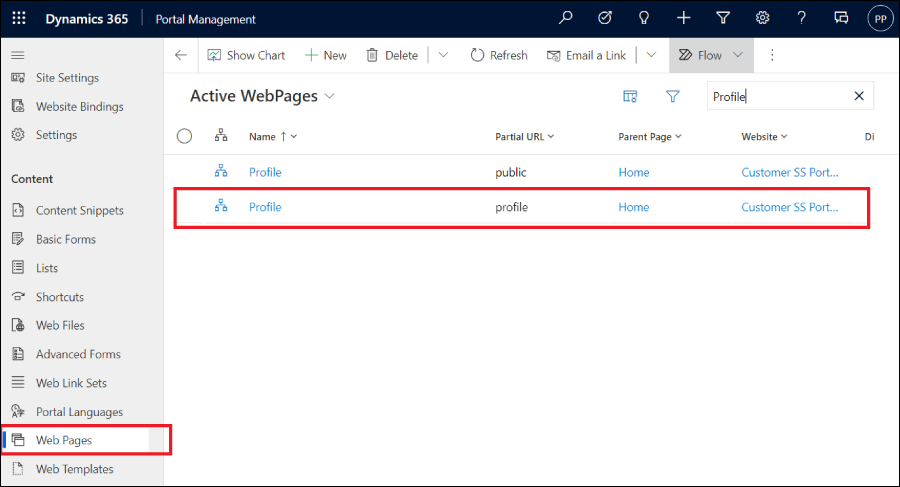
- Now to set a custom field value on the profile page, you need to customize the profile page.
- To customize the profile web page you can use Portal Management App or you can directly edit the page from the portal after the Administration login.
- To customize the profile page from PortalManagement App, click on Web Pages from the left menu and edit the Profile Web Page.
- On the profile detail page, from the Localized Content section open the translated profile page.
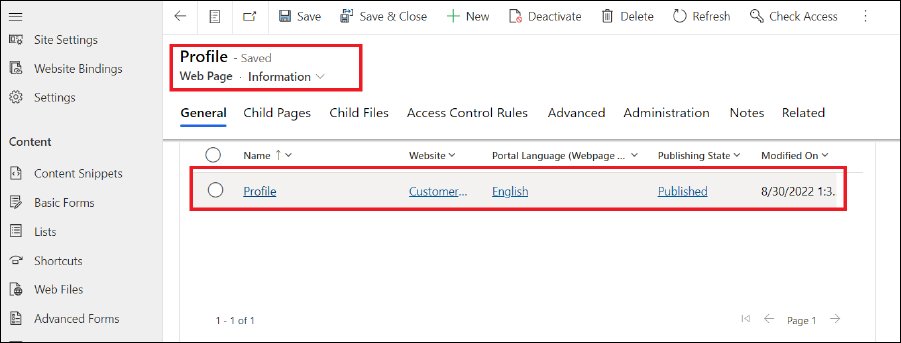
- In the profile detail page, click on Advanced tab.
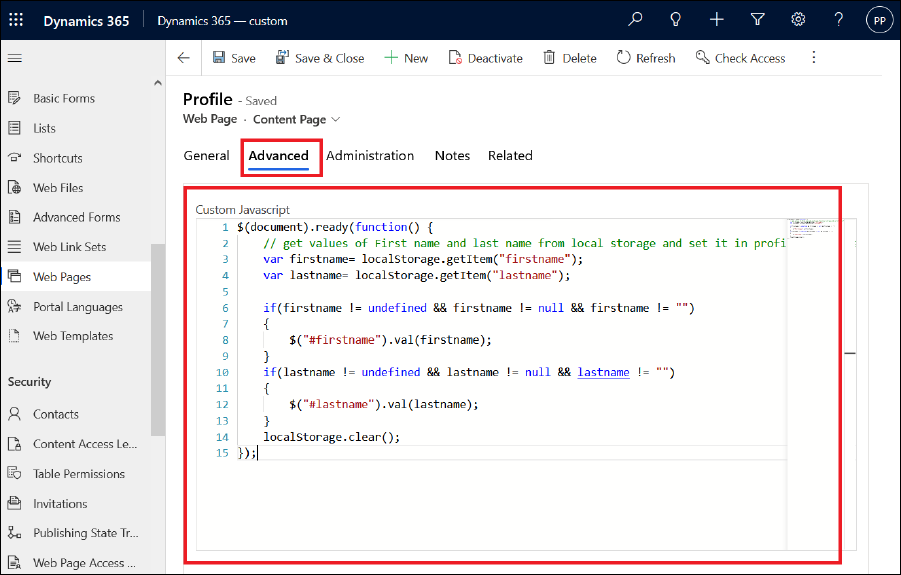
- Add custom js in JS editor and save the record. Here we have added JS to set field values which are stored at the time of registration in local storage in profile form.
- JS Code:
$(document).ready(function() {
// get values of First name and last name from local storage and set it in profile form fields.
var firstname= localStorage.getItem(“firstname”);
var lastname= localStorage.getItem(“lastname”);
if(firstname != undefined && firstname != null && firstname != “”)
{
$(“#firstname”).val(firstname);
}
if(lastname != undefined && lastname != null && lastname != “”)
{
$(“#lastname”).val(lastname);
}
localStorage.clear();
});
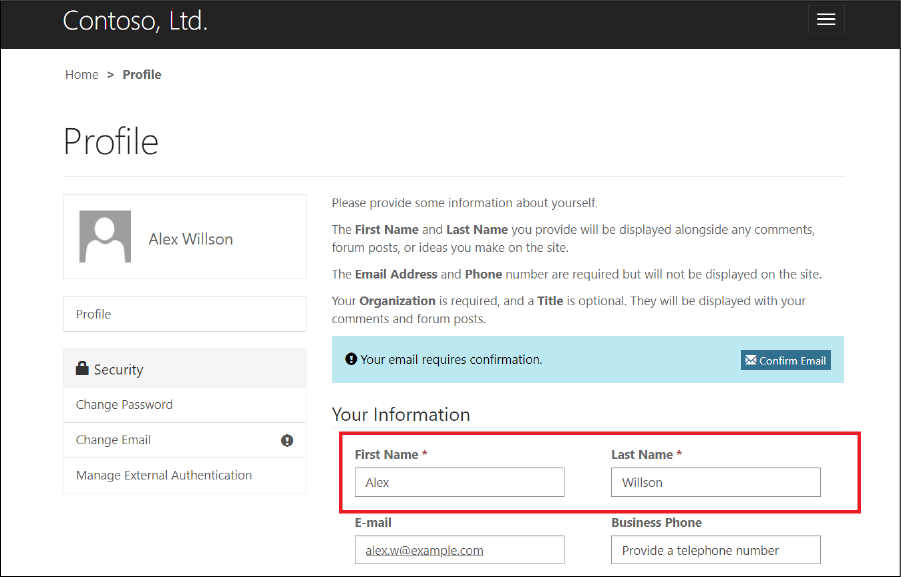
- Save the record and clear the portal cache. Now register by adding Firstname Lastname. After successful registration, you will be redirected to the Profile page and on the Profile page, you see your First name And the last name get reflected which you entered at the time of registration. By saving the Profile form the custom field information will be saved in CRM.
- From the left menu, click on Contacts and open any one contact to whom you want to send an invitation.
- In the Contact Detail Form, a create Invitation Ribbon button will be available. Click on the Create Invitation button to send an Invitation.
- The Invitation form will be open for creating the invitation. Fill up the form and save it.
- After saving the record from the top menu, click Flow -> Send Invitation. By clicking on Send Invitation, the portal invitation will be sent to the portal user.
- To check, copy the invitation code from Advanced -> Invitation code and test in the portal.
- On the portal sign-up page, a Redeem invitation tab will be available. Click on this tab and add the invitation code to the input.
- After that, click on Register. After code verification, you will be redirected to the registration page with pre-filled information. Now you can register by filling out the form and using the portal.
Send Invitation to multiple contacts:
- To send portal invitations to bulk contacts, you need to create a custom on-demand workflow for the contact entity.
- To create a workflow, go to Settings -> Advanced Settings -> Processes. Click on New. Select Category as Workflow and select Contact in Entity, and click on OK.
- On the next screen, check the box As an on-demand process.
- After that, set the steps to create an invitation record and call the invitation standard workflow.
- Click on Add Step -> Create Record.
- Now select entity Invitation and click on Set Properties.
- Next, set contact-related dynamic field values for the invitation entity in the next screen. Set Name, Owner/Sender, Invite Contact fields.
- After that, click on save and close.
- After the Invitation record, create a step, and add a step to call send invitation standard workflow. Click on Add Step -> Start Child Workflow.
- Select Entity to Start Child Workflow and select Send Invitation Workflow.
- Save the workflow and activate it.
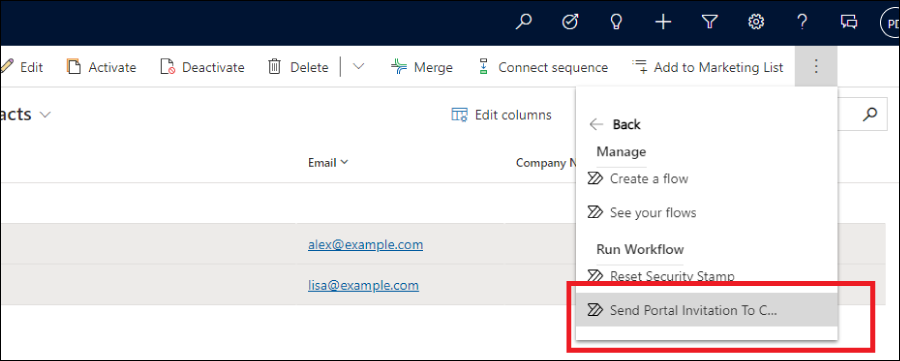
- Now go to Contacts -> select contacts to whom you want to send the portal invitation.
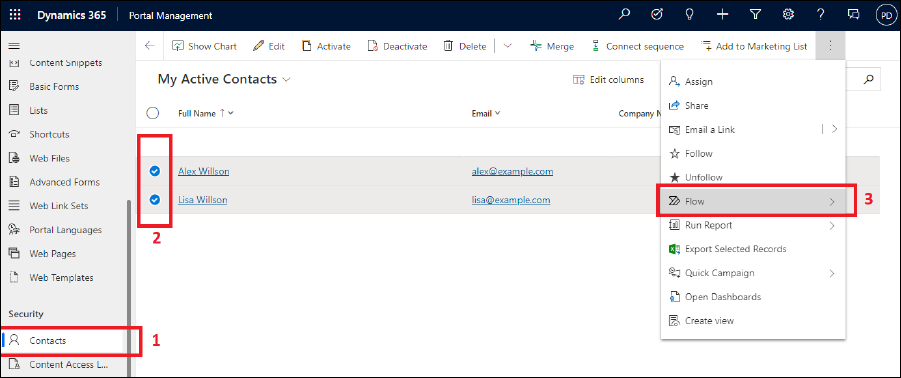
- From the top menus, click on Flow -> click on the flow you have created, i.e., Send Portal Invitation to Contacts.
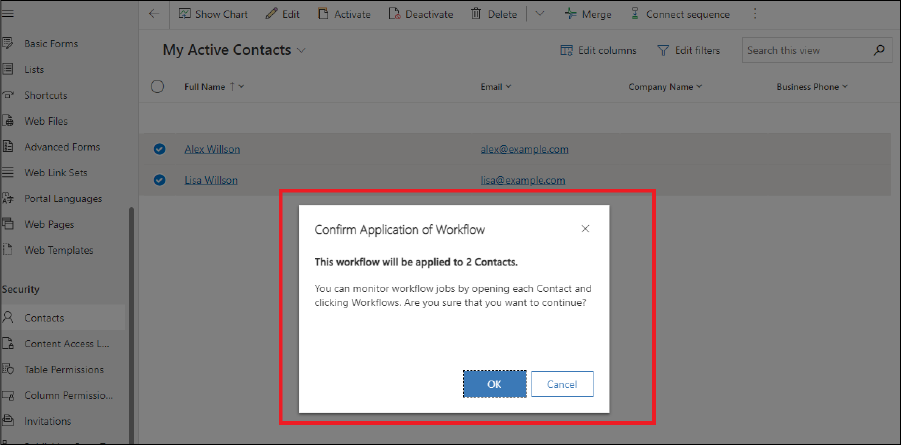
- The confirmation for selected records will be displayed. Click on OK to continue. The invitations will be created, and you will see the invitation mail in the contact detail timeline.
All product and company names are trademarks™, registered® or copyright© trademarks of their respective holders. Use of them does not imply any affiliation with or endorsement by them.


